The amount of time it takes to complete your first backup will vary according to how much data you have stored in the user accounts that are being backed up. Once your initial backup is complete, you’ll be able to use the restore and export functions in Spanning.
Spanning Administrators can administer backups and restore data for any licensed user in the tenant.
Users are also able to restore their own data for Mail, Calendar, Contacts, and OneDrive. The benefits of empowering end-users include:
- Improved user productivity by enabling them to easily and quickly restore lost or deleted data.
- Fewer support calls.
- Saved time for IT Admins to focus on more strategic tasks.
Use the procedures below to restore or export data from backup. Start by viewing the backup data as described in To access the user's backup data. Then proceed to the applicable restore or export procedure.
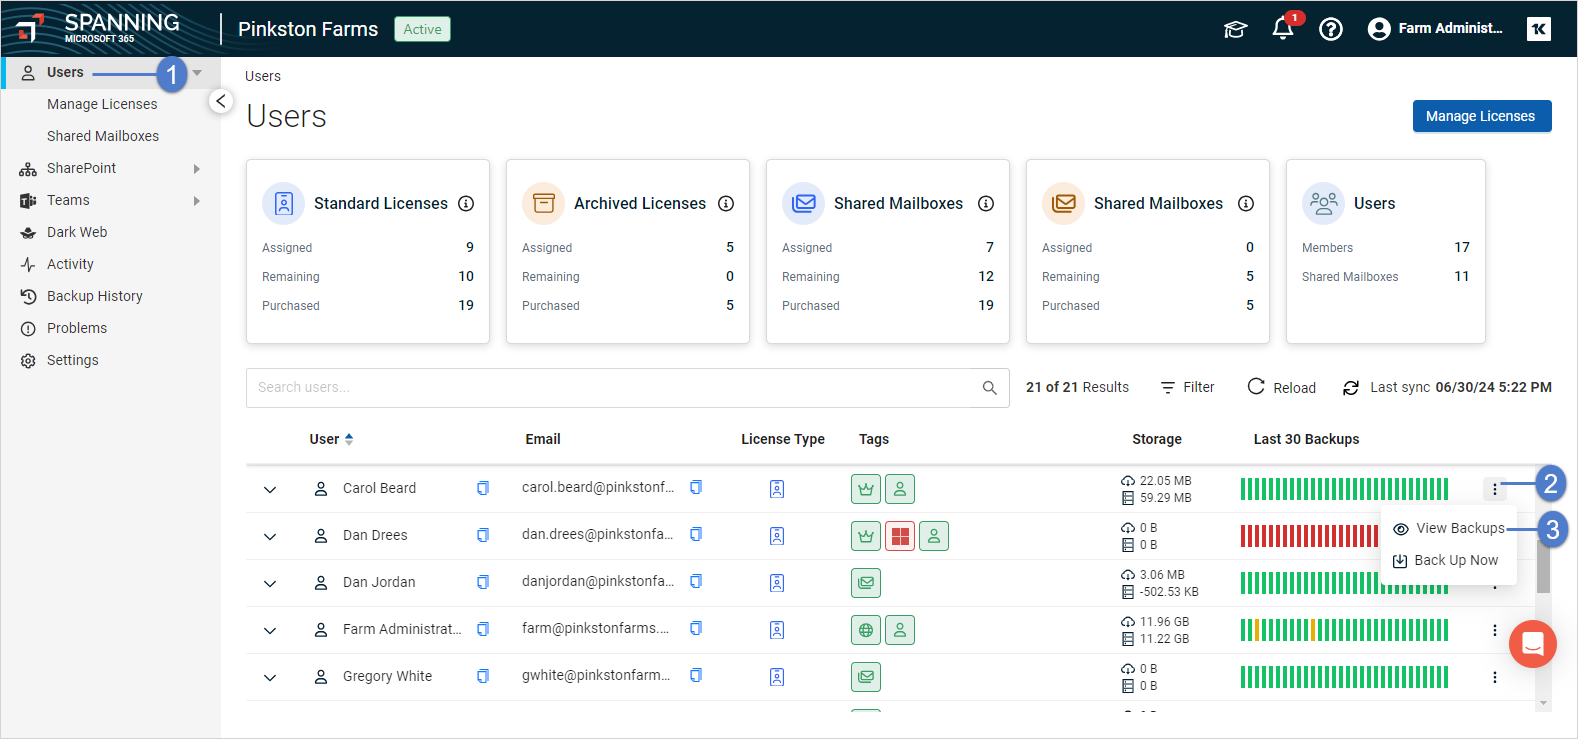
- Log into your Spanning Backup for Microsoft 365 account as an admin user.
- Click Users.
- Locate the user whose data you want to restore. Click the user's
 icon and select View Backups.
- Select the Mail, Calendar, Contacts, or OneDrive tab to access the type of data you will be restoring. Proceed to one of the following:
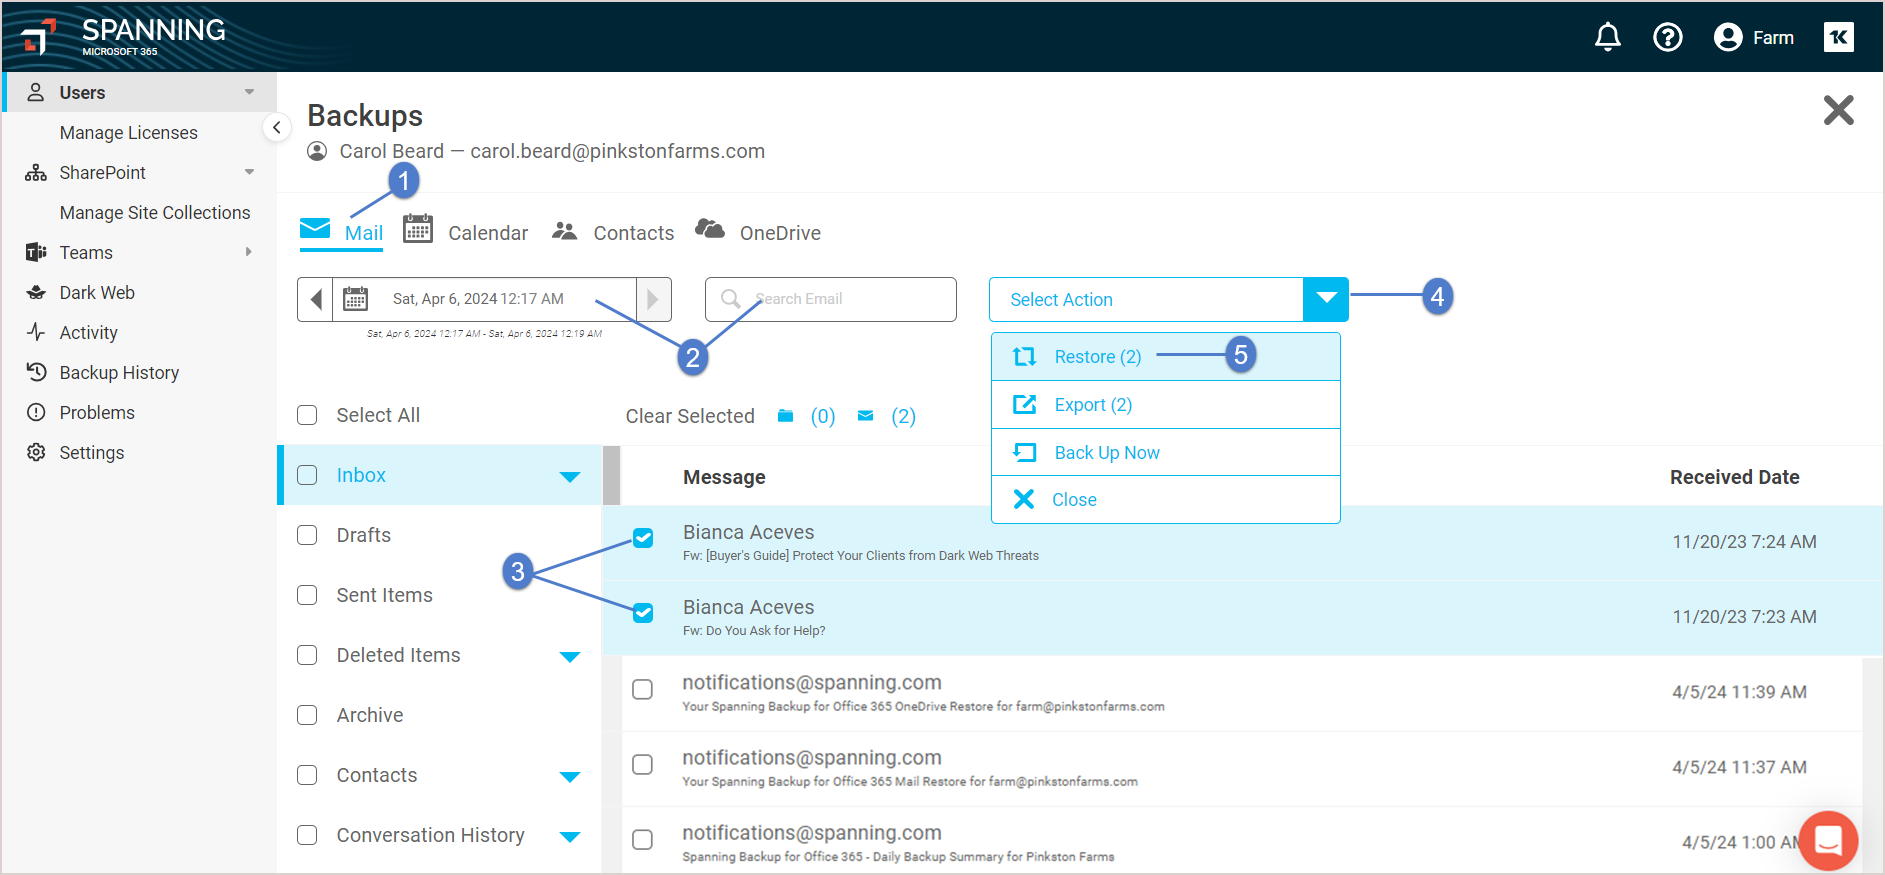
- On the Mail tab, locate the items you want to restore. You can use one search method or multiple methods to help you find what you're searching for. You can search by:
- Labels – Your mailbox is laid out the same way in Spanning Backup that it is in M365. Use the labels on the left the same way you would in M365.
- Point in time – Use the calendar date selector to choose a specific backup.
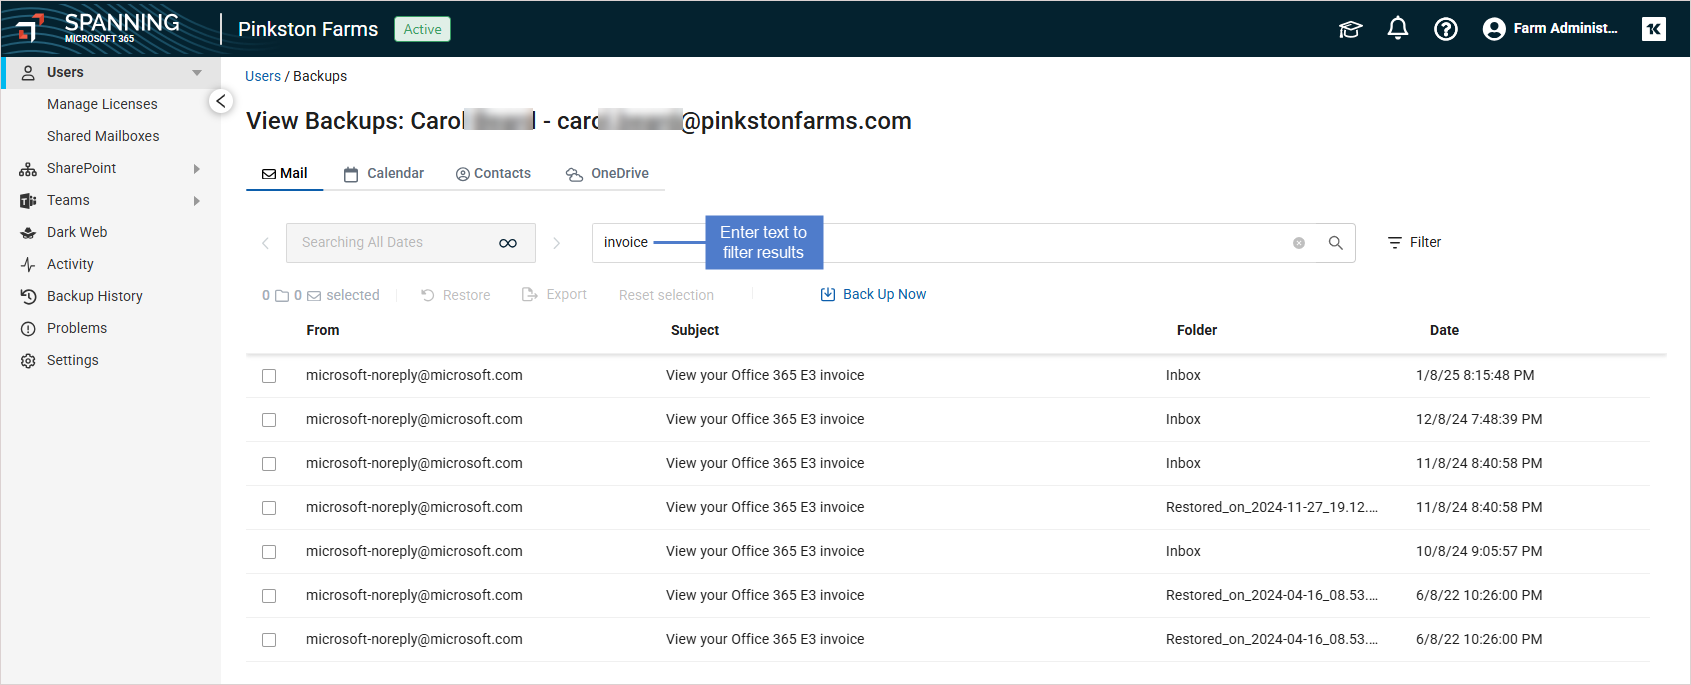
- Author or subject – You can type into the Search field and Spanning automatically starts searching your email by author and subject and populates the panel below with a list of matches.
Use the Search field to quickly find items by author or subject.
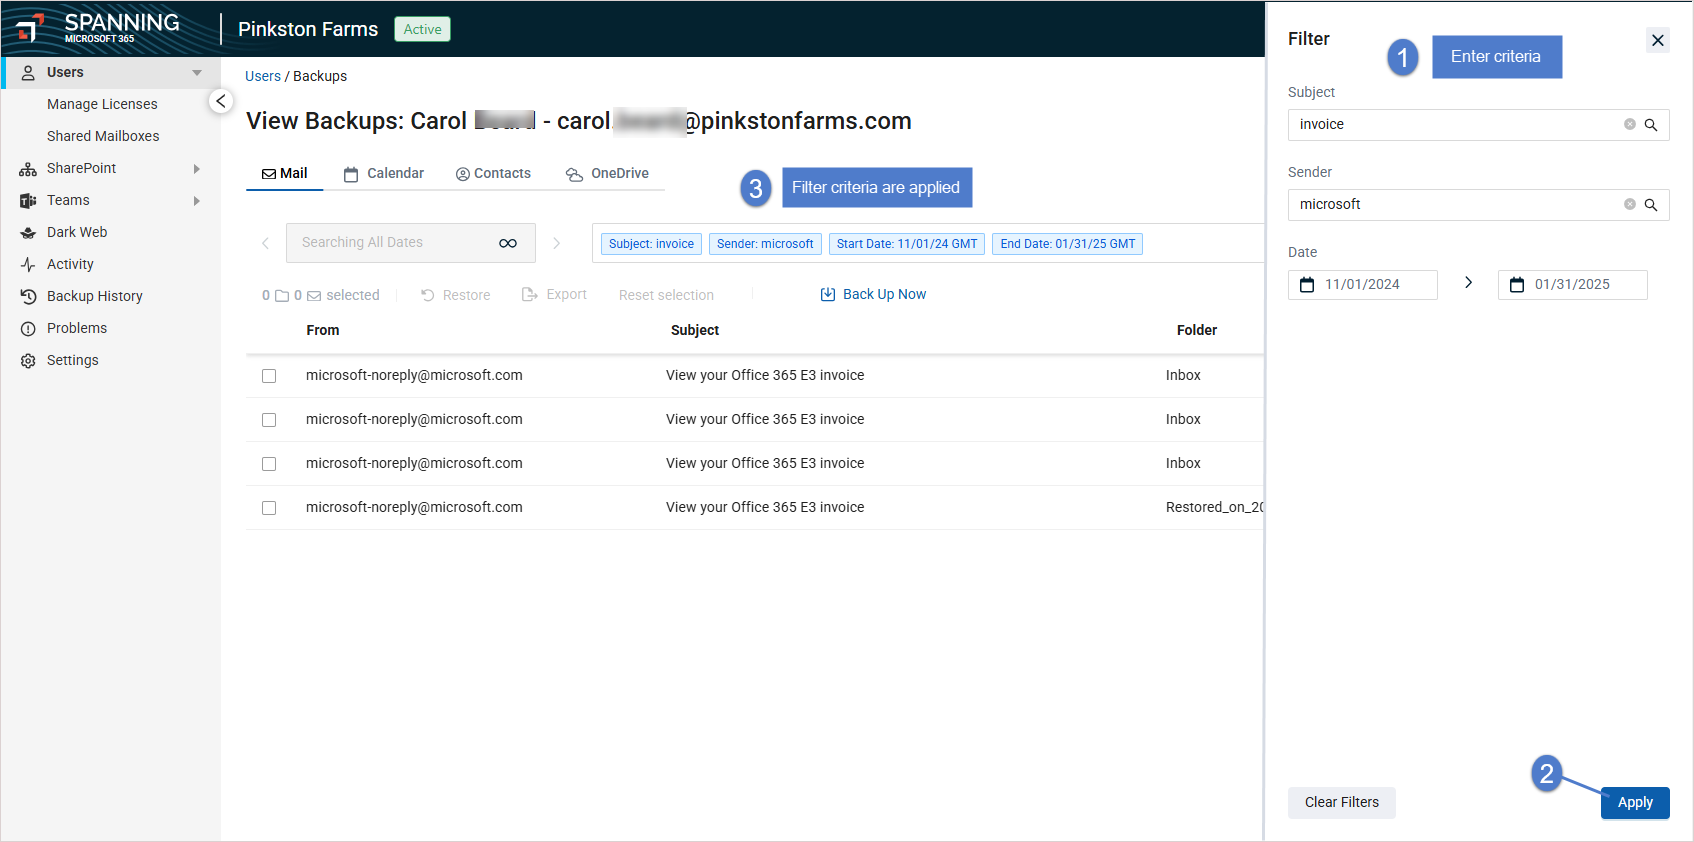
Use the Filter to search by multiple criteria: subject, sender, or date range.

- Check boxes to select items to restore.
- To select an email, check the box next to the email.
- To select a folder, check the box next to the folder name.
- Do one of the following:
- To restore, click Restore and continue with the steps in this procedure.
- To export selected items into a compressed file, proceed to To export mail.
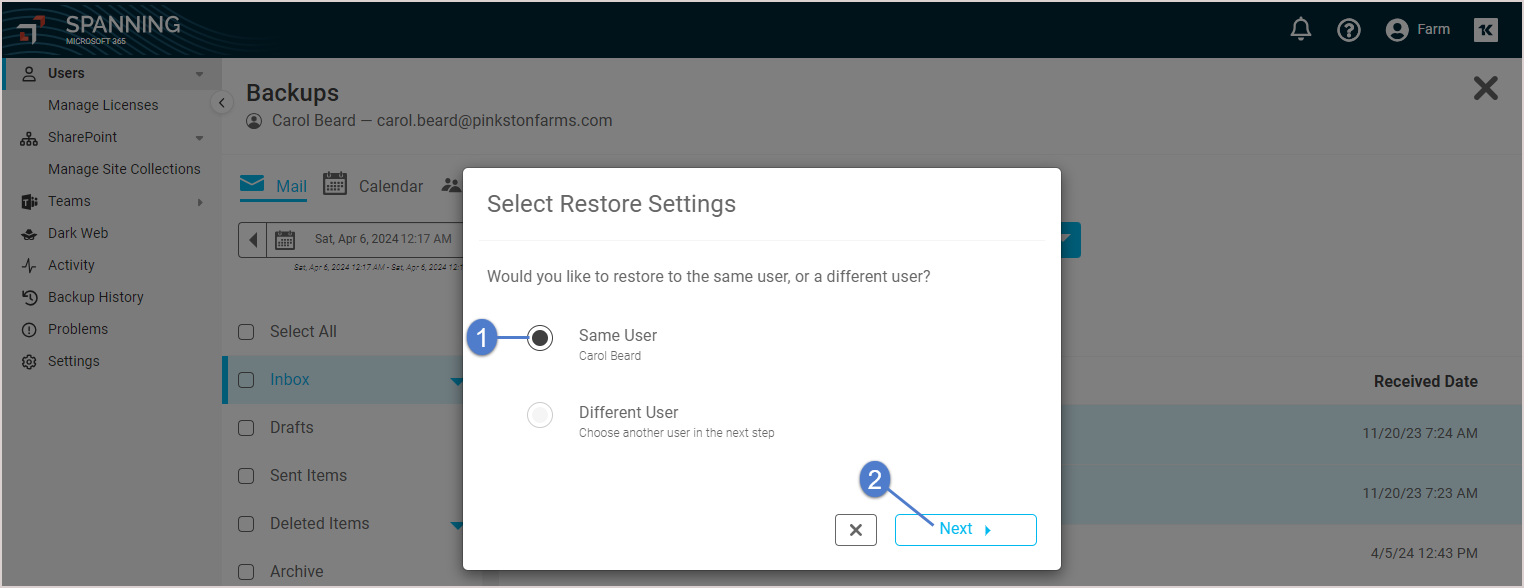
- Choose whether to restore to the same user’s account or to a different user’s account within the same tenant.
NOTE Spanning admins can perform cross-user restores. Non-admin users can only restore their own backup data to their own account.
- Click Next.
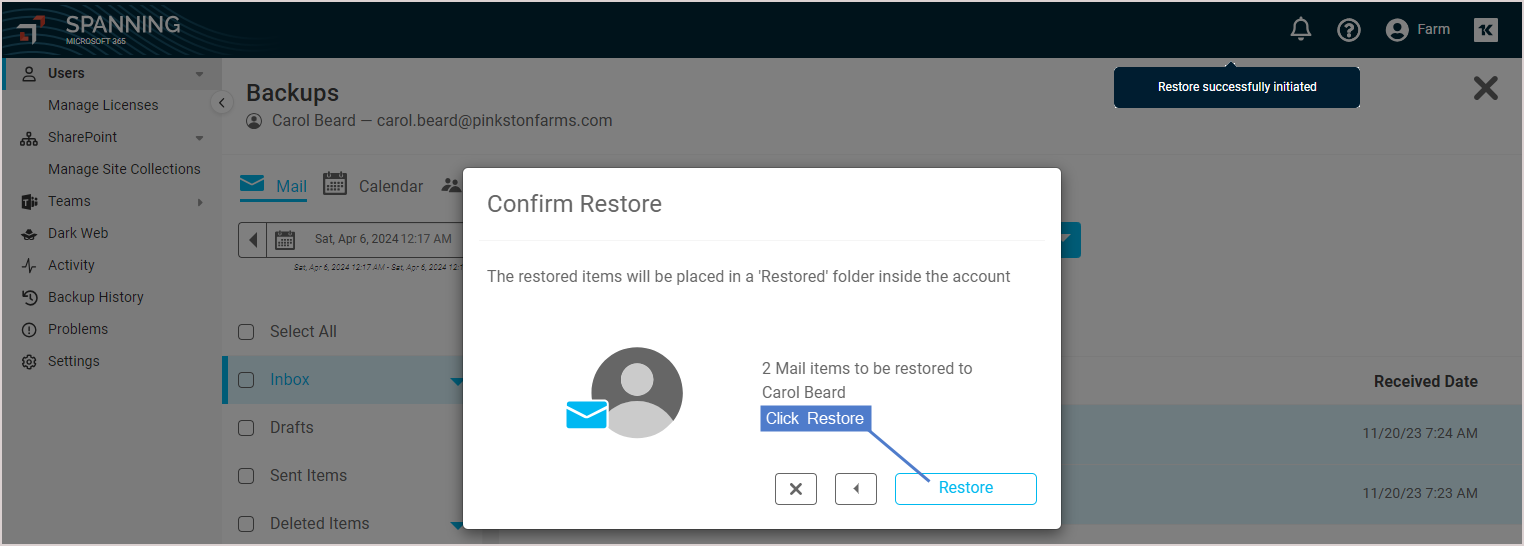
- Click Confirm to continue. A notification displays at the top of the page indicating that the restore was initiated.
- When the restore is complete, you receive an email notification. The restore displays on the Activity page in the Past items. Click the activity to view details about the restore.
Use these steps to export selected items into a compressed file. When the operation is complete, you receive an email with instructions for downloading the file.
- Once you’ve selected the items you want to restore on the Mail tab, click Export.
- Choose whether export to PST or EML format.
- Click Confirm to continue.
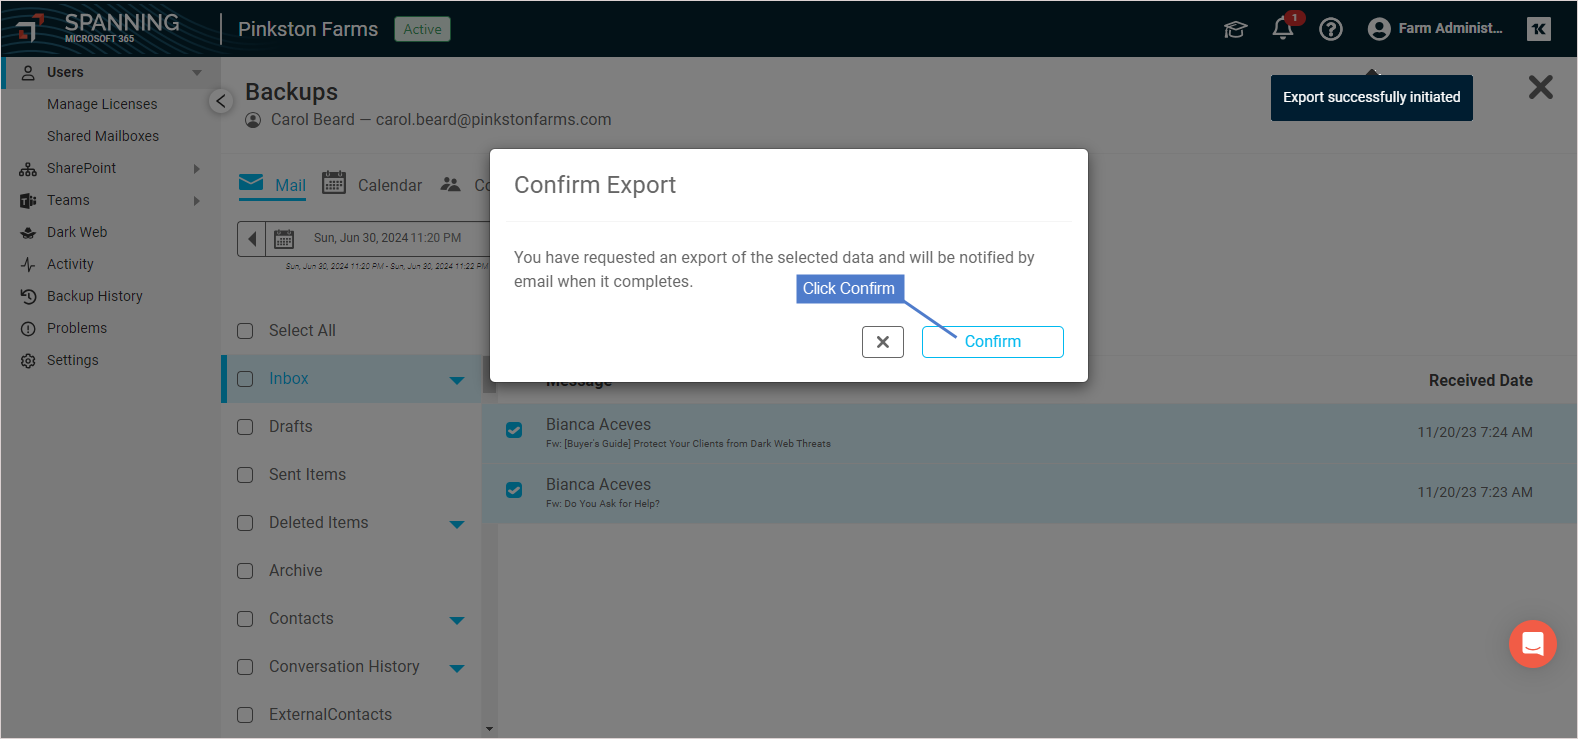
- The export runs.
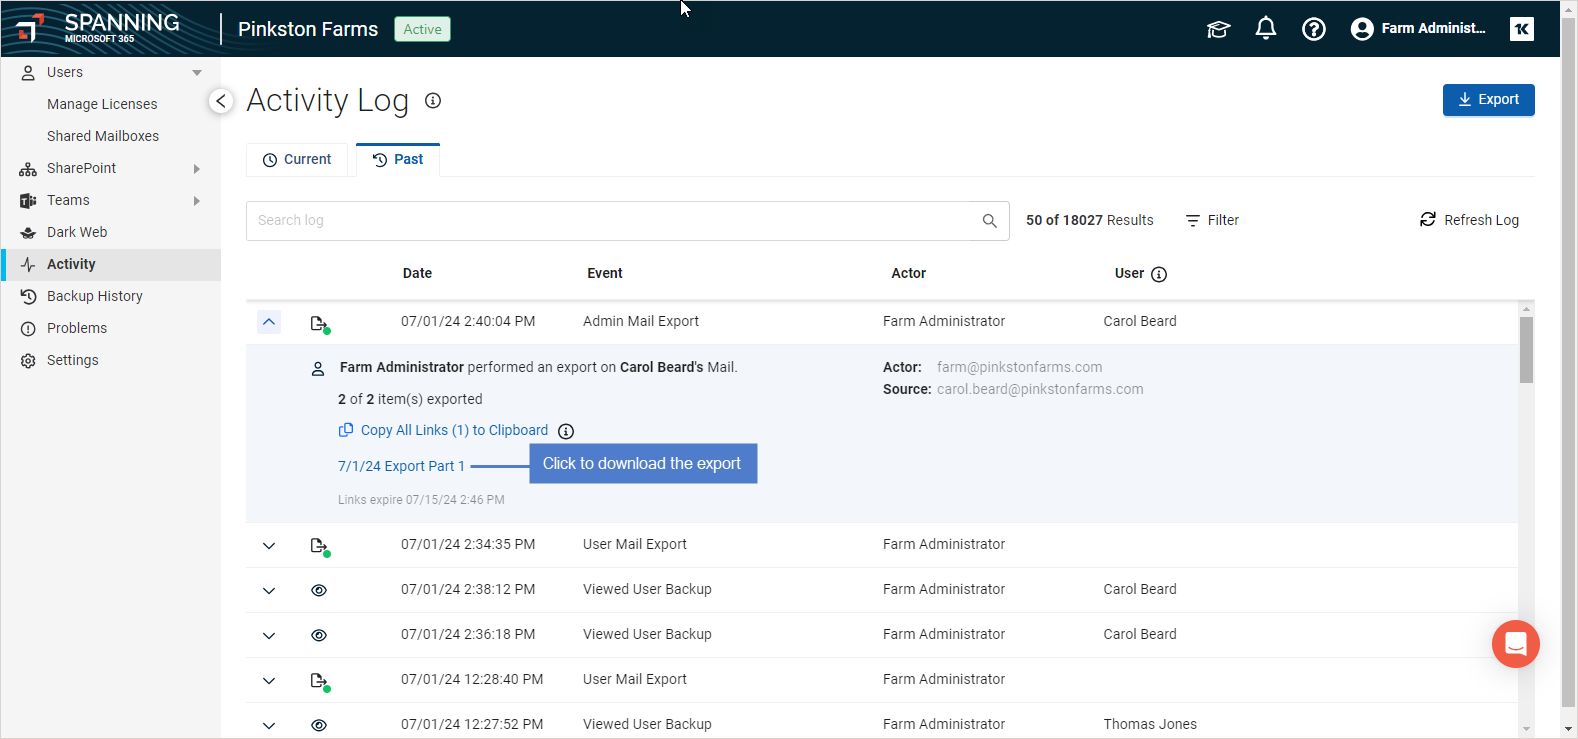
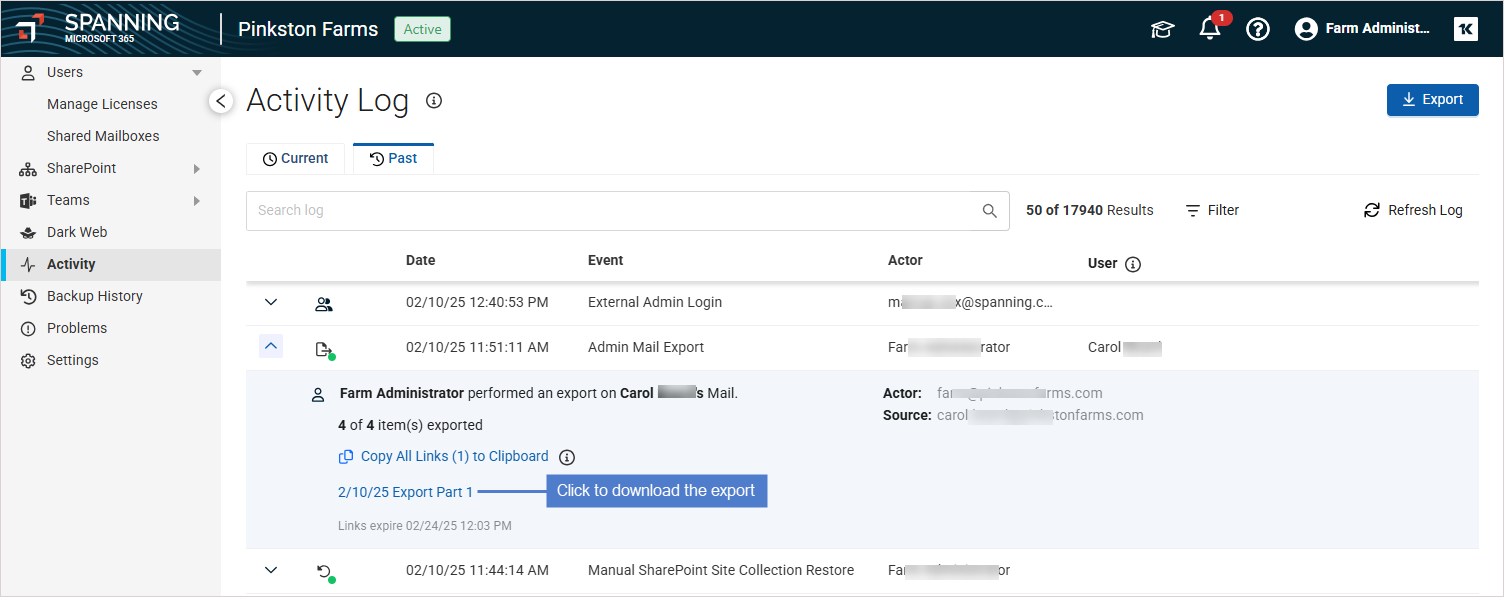
- When the export has finished compressing, you receive an email notification. The export displays on the Activity page in the Past items.
- Click the activity to view details about the export.
- Click the Export link to save the export to your local hard drive.
NOTE If the Export link is not clicked, it expires 14 days after the export has finished compressing. After the Export link has been clicked, it is disabled in 24 hours.
- The export is downloaded as a compressed .zip file. After you extract the file (WinZip for Windows users, Archive Utility for Mac users), all of your selected email is in .eml or .pst format. These email files can be imported into many email clients, including Microsoft Outlook, Apple Mail, or Mozilla Thunderbird.
NOTE Outlook example – To import the files into Outlook, simply drag them into the desired folder: 
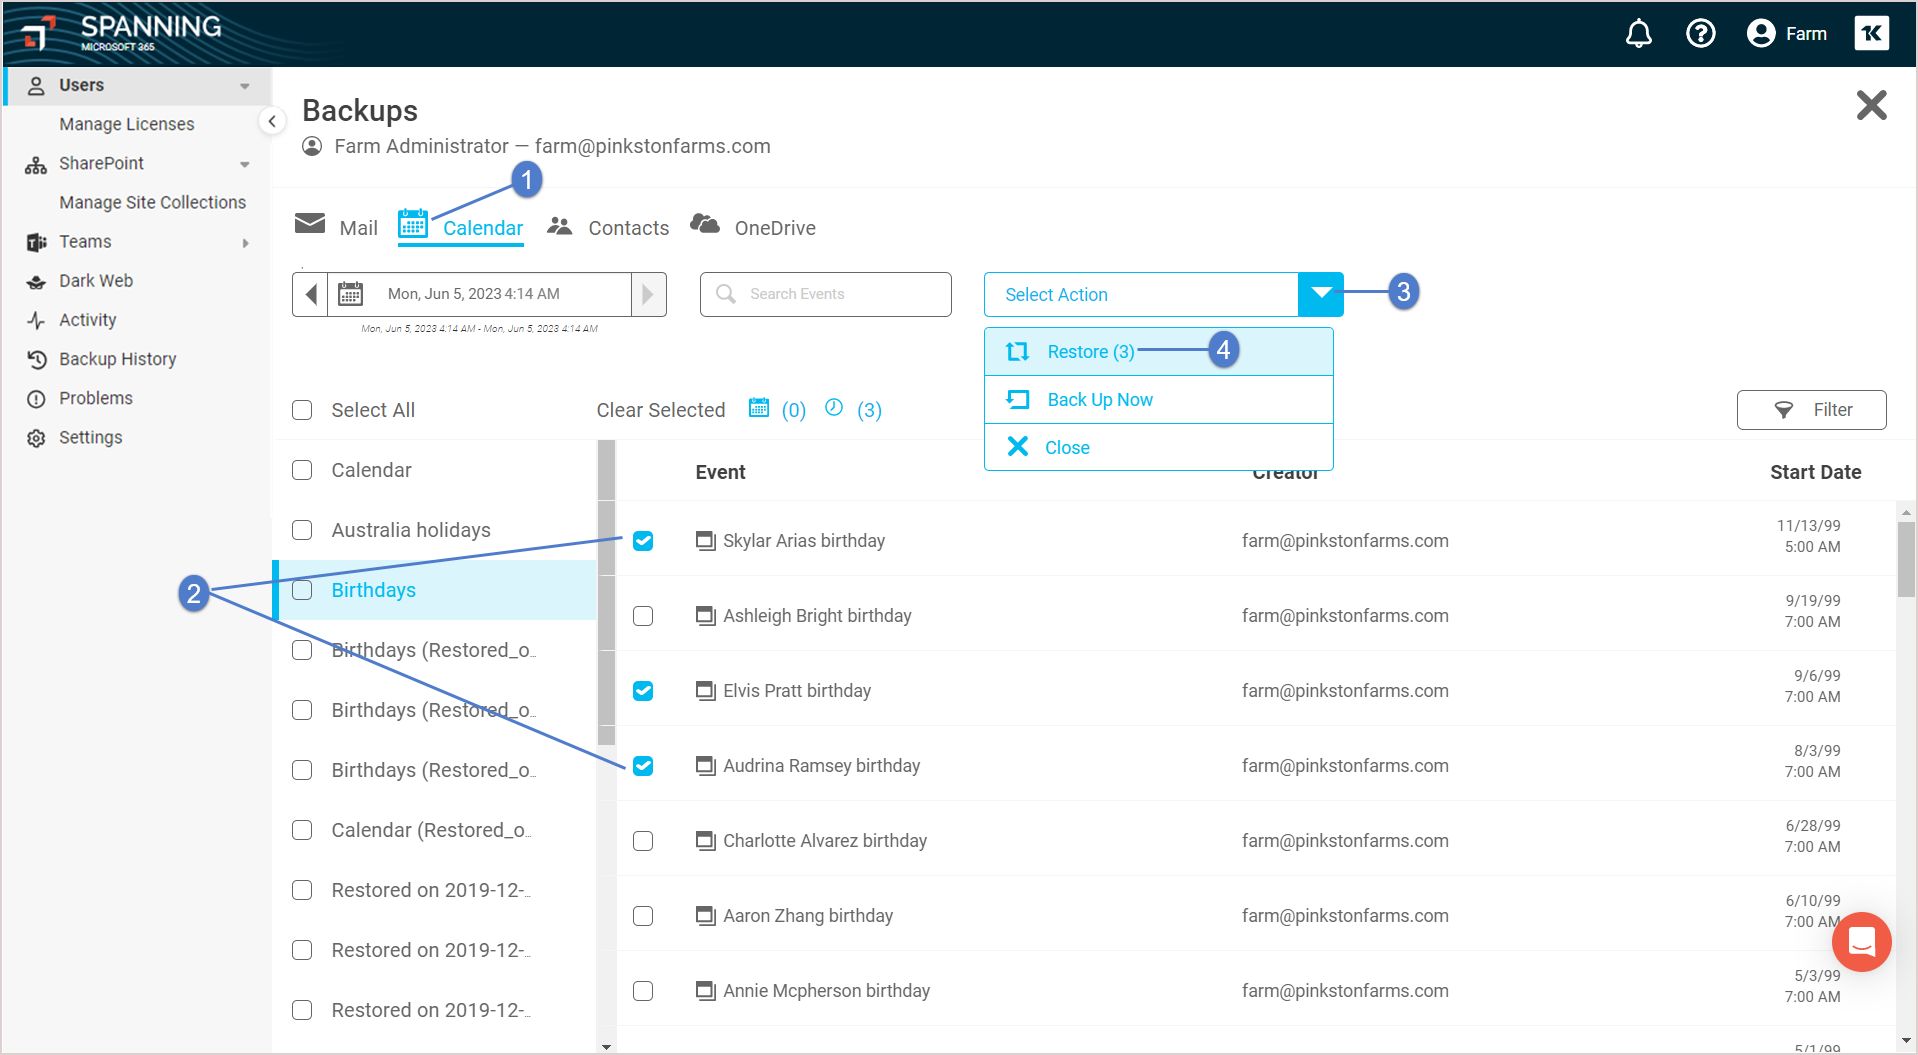
- On the Calendar tab, check boxes to select the items you want to restore. You can select a single event, multiple events, or entire calendars.
- Select Restore from the Select Action list.
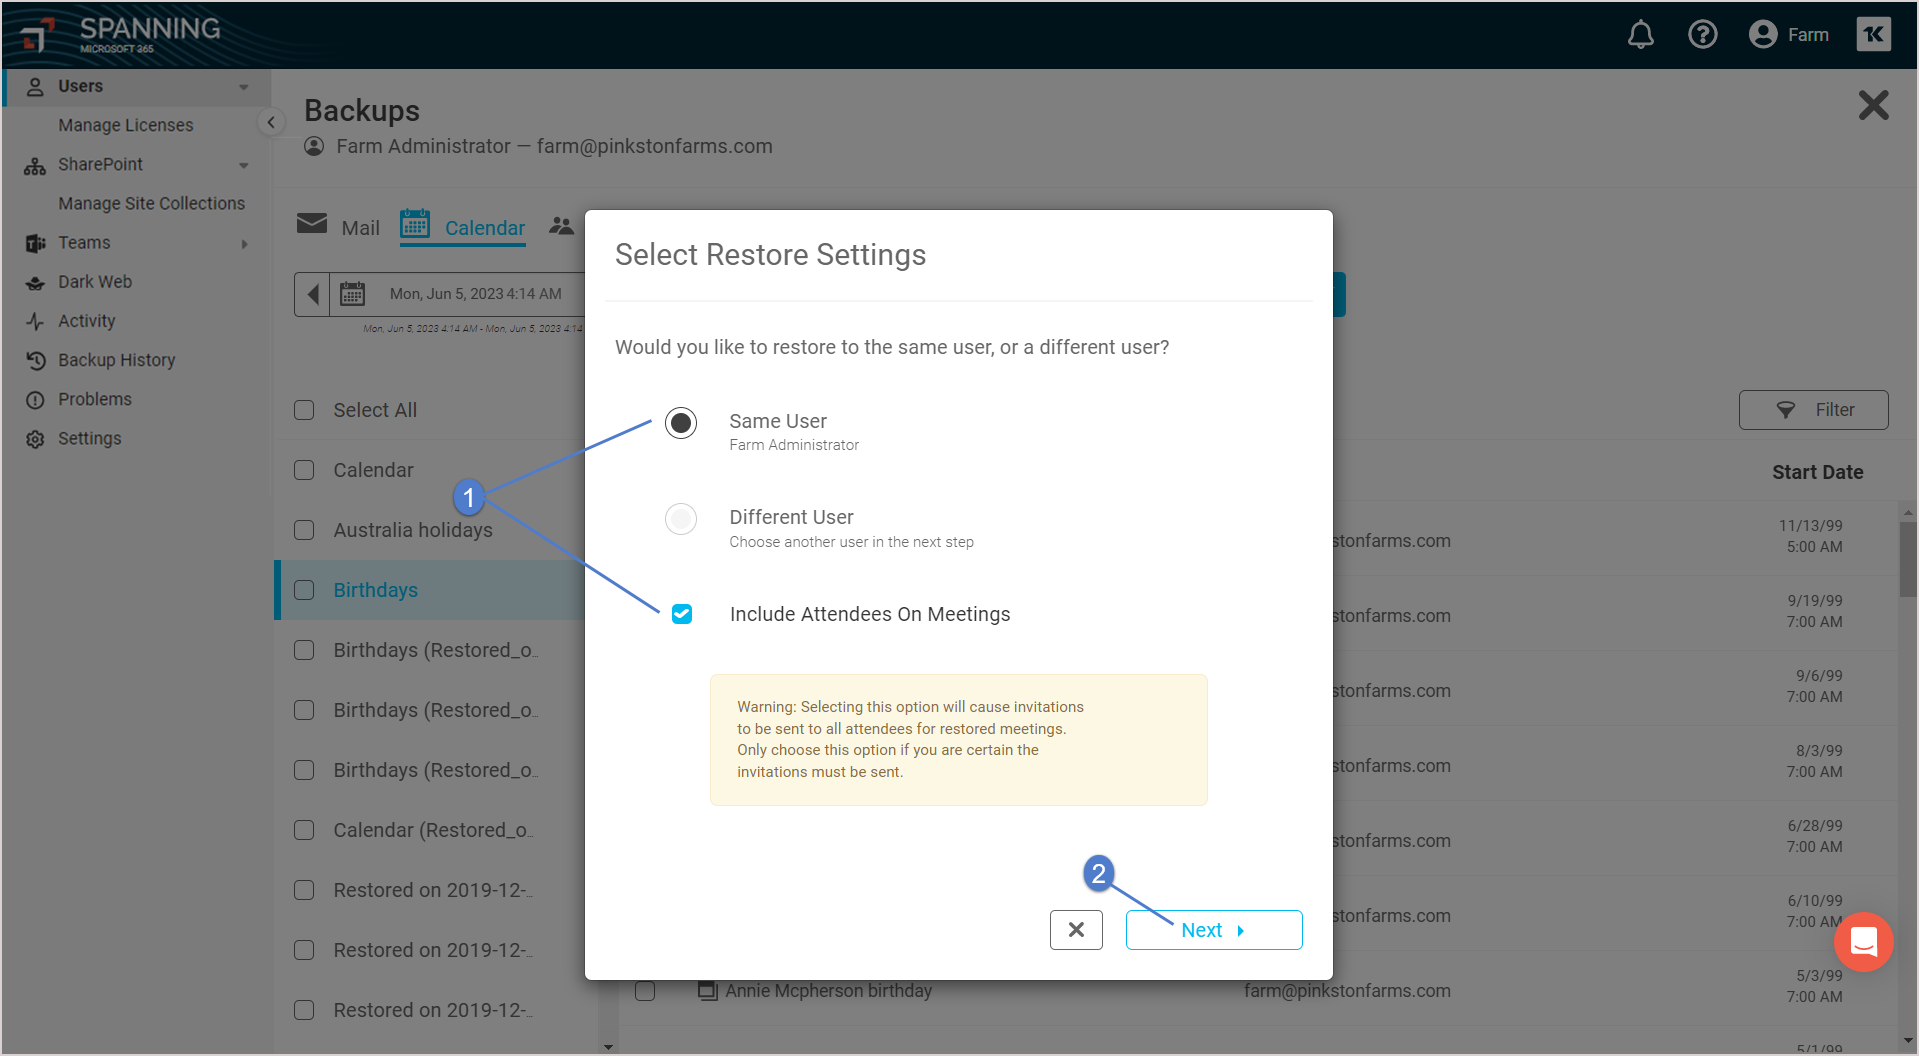
- Choose whether to restore to the same user’s account or to a different user’s account within the same tenant. You can also opt to restore calendar events with attendees.
NOTE Spanning admins can perform cross-user restores. Non-admin users can only restore their own backup data to their own account.
-
Click Next.
- If you are restoring to a different user, select the user and click Next.
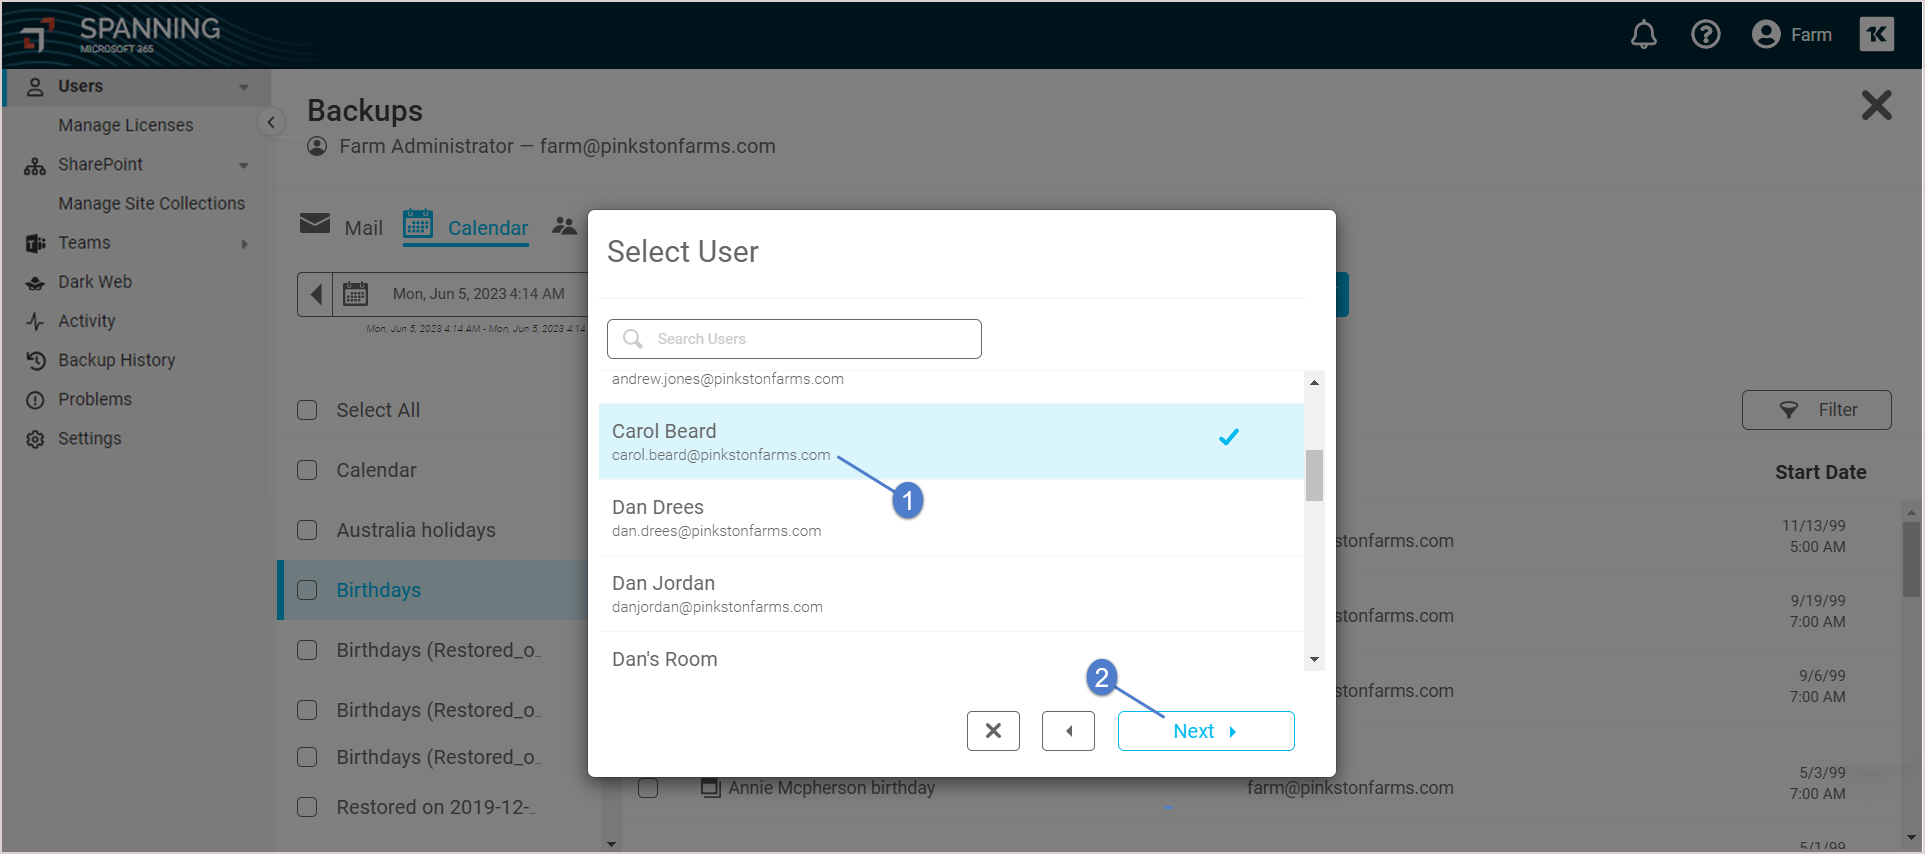
- Click Restore. A notification displays at the top of the page indicating that the restore was initiated.
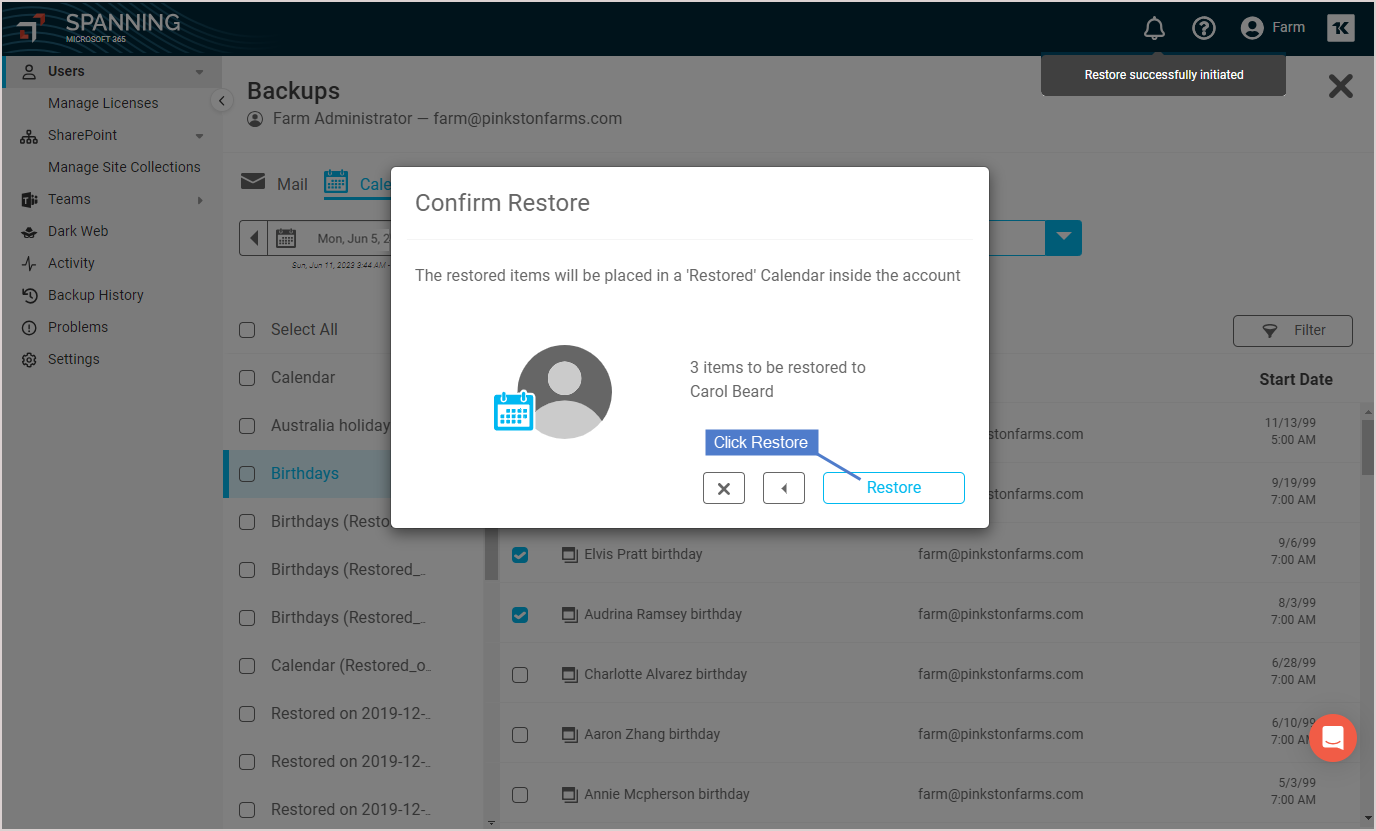
- When the restore is complete, you receive an email notification. Data is restored into a newly created calendar in the user’s active Microsoft 365 Calendar, titled Restored on (date).
- On the Contacts tab, check boxes to select the items that you want to restore. You can select a single contact, contact folder, or a mix of contacts from different folders.
- Select Restore from the Select Action list.
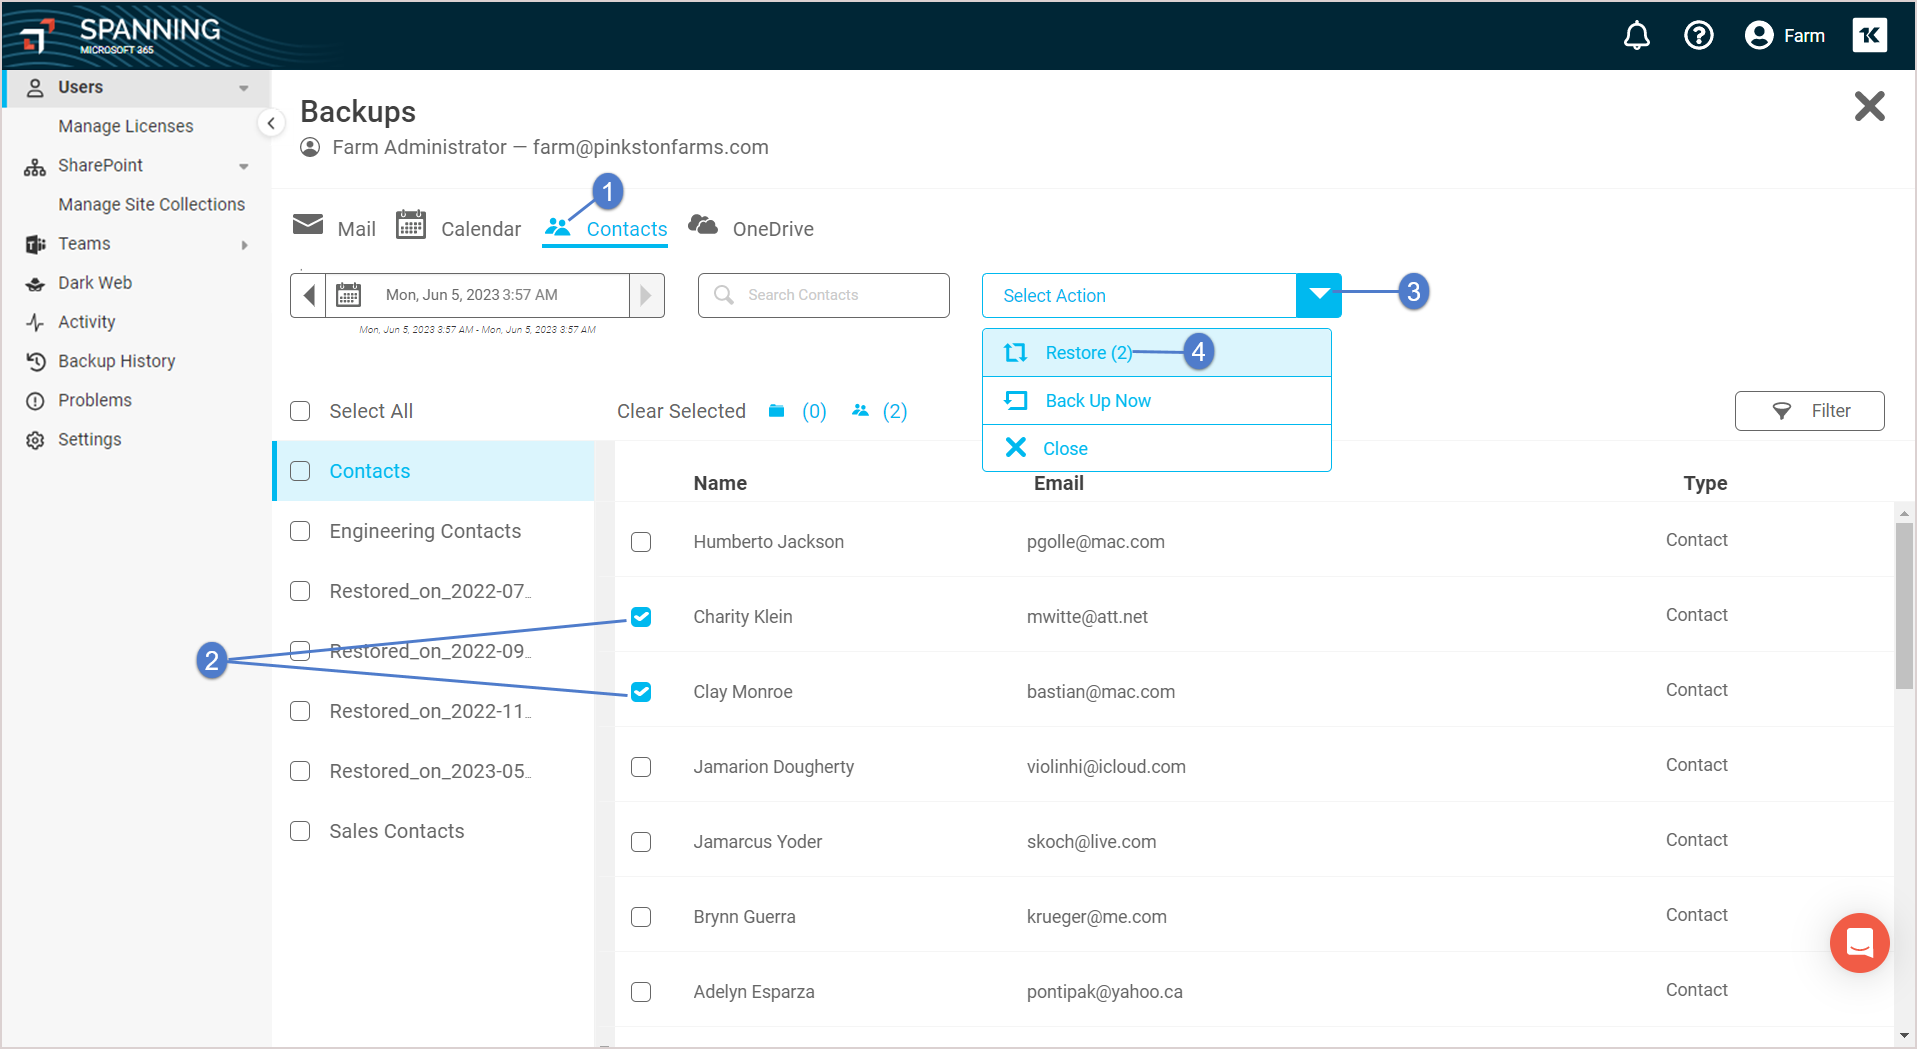
- Choose whether to restore to the same user’s account or to a different user’s account within the same tenant.
NOTE Spanning admins can perform cross-user restores. Non-admin users can only restore their own backup data to their own account.
-
Click Next.
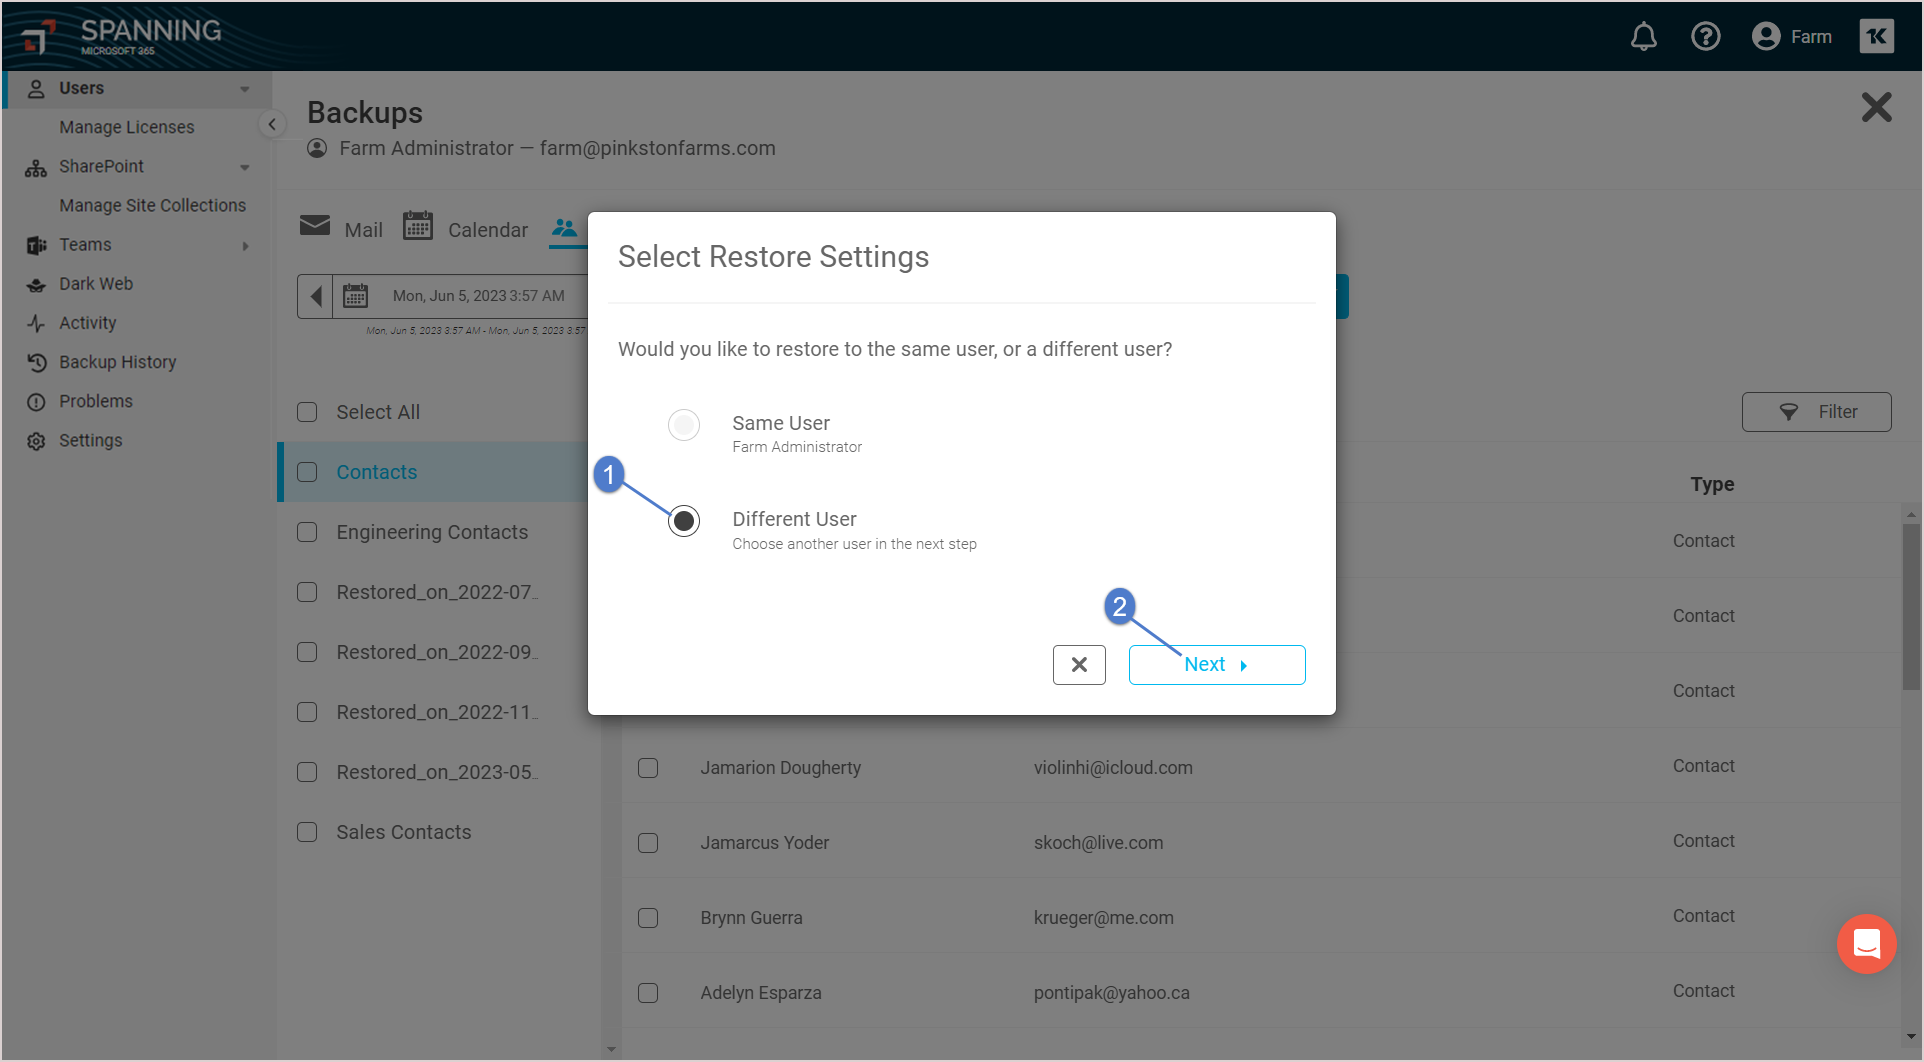
- If you are restoring to a different user, select the user and click Next.
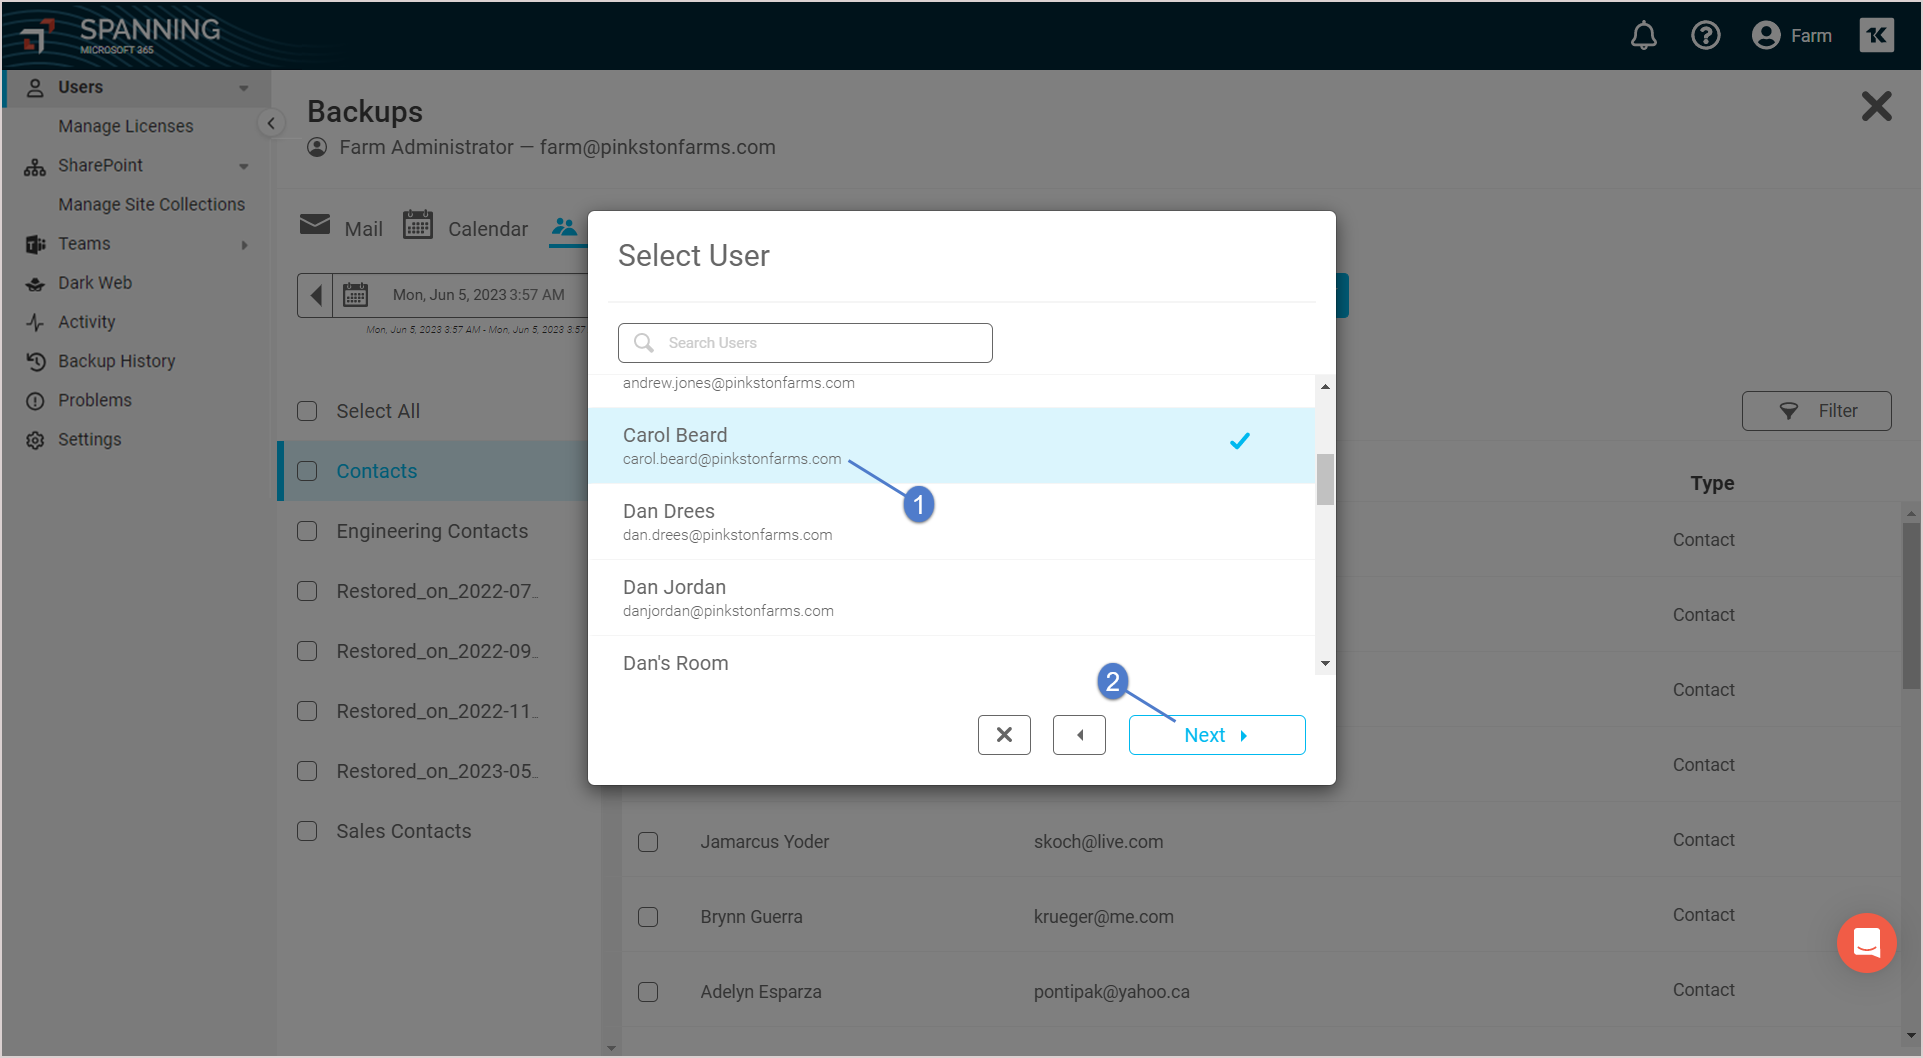
- Click Restore. A notification displays at the top of the page indicating that the restore was initiated.
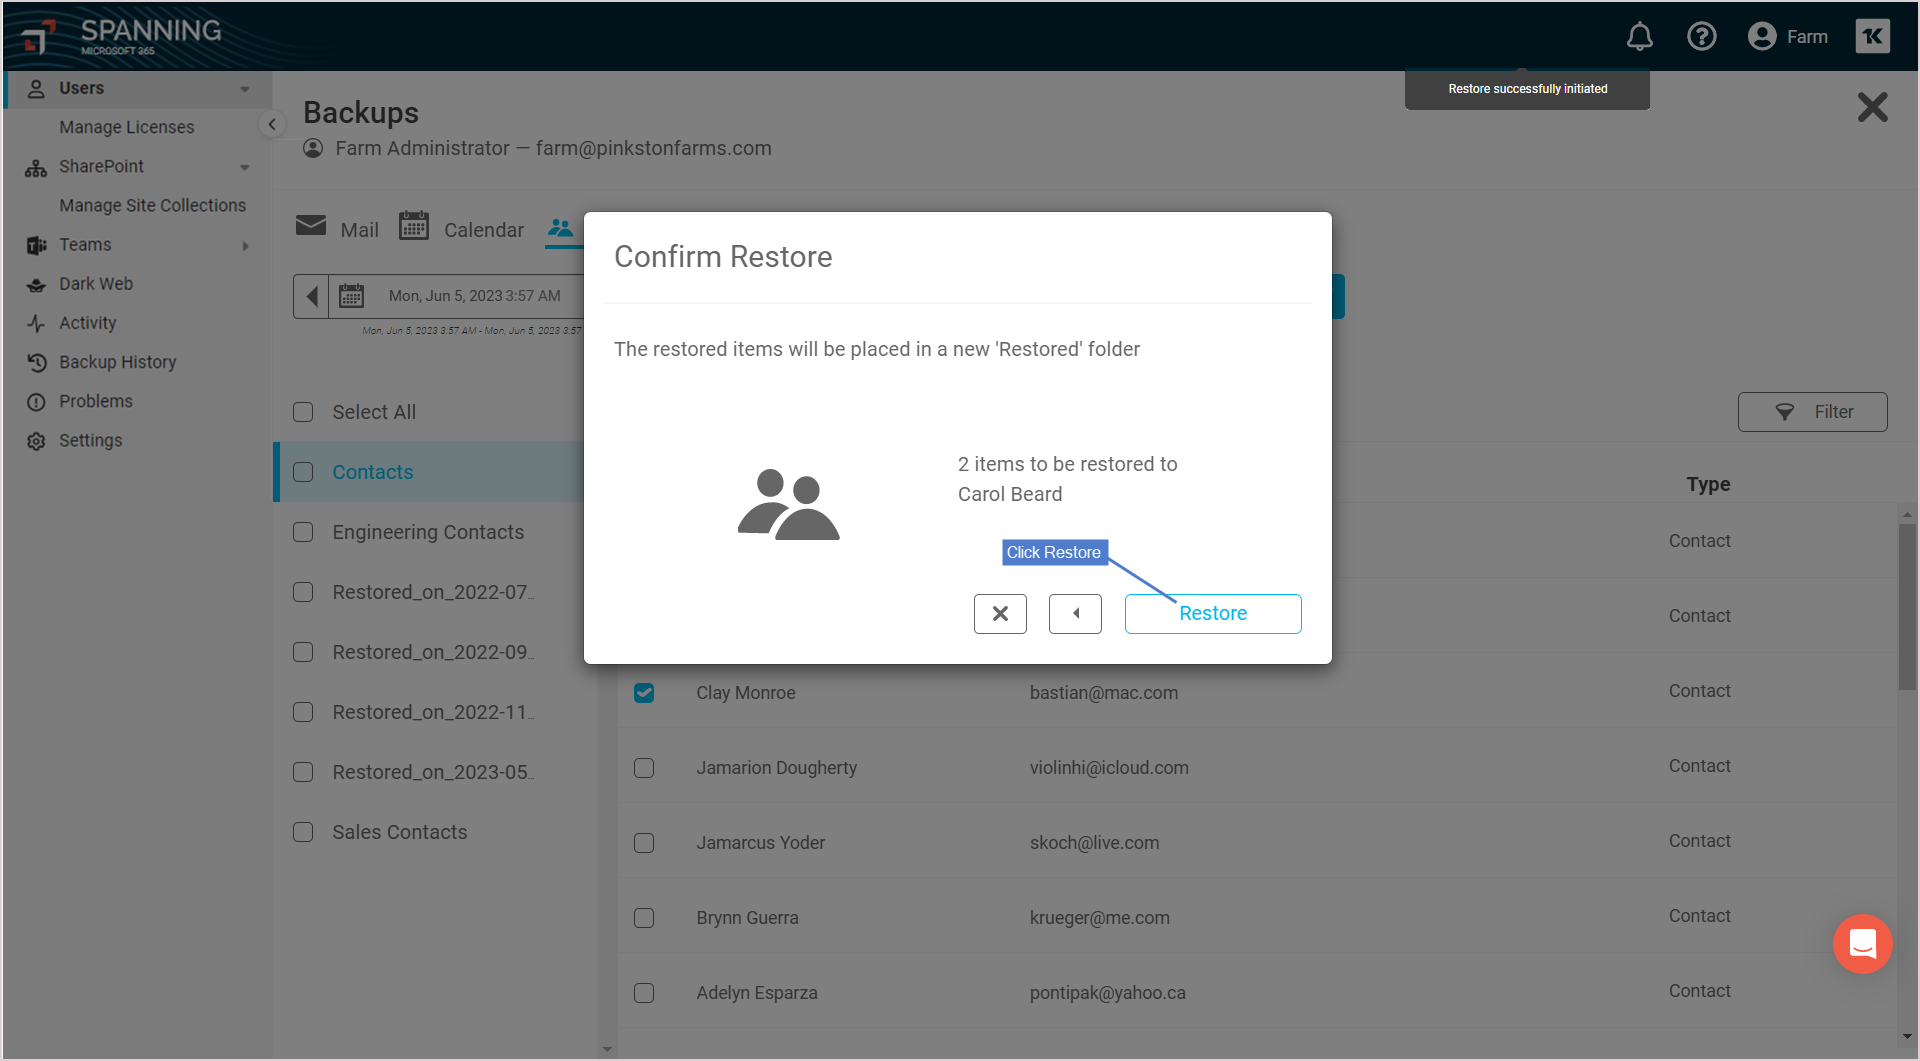
- When the restore is complete, you receive an email notification. Data is restored into a newly created folder in the user’s active Microsoft 365 Exchange Contacts, titled Restored on (date).
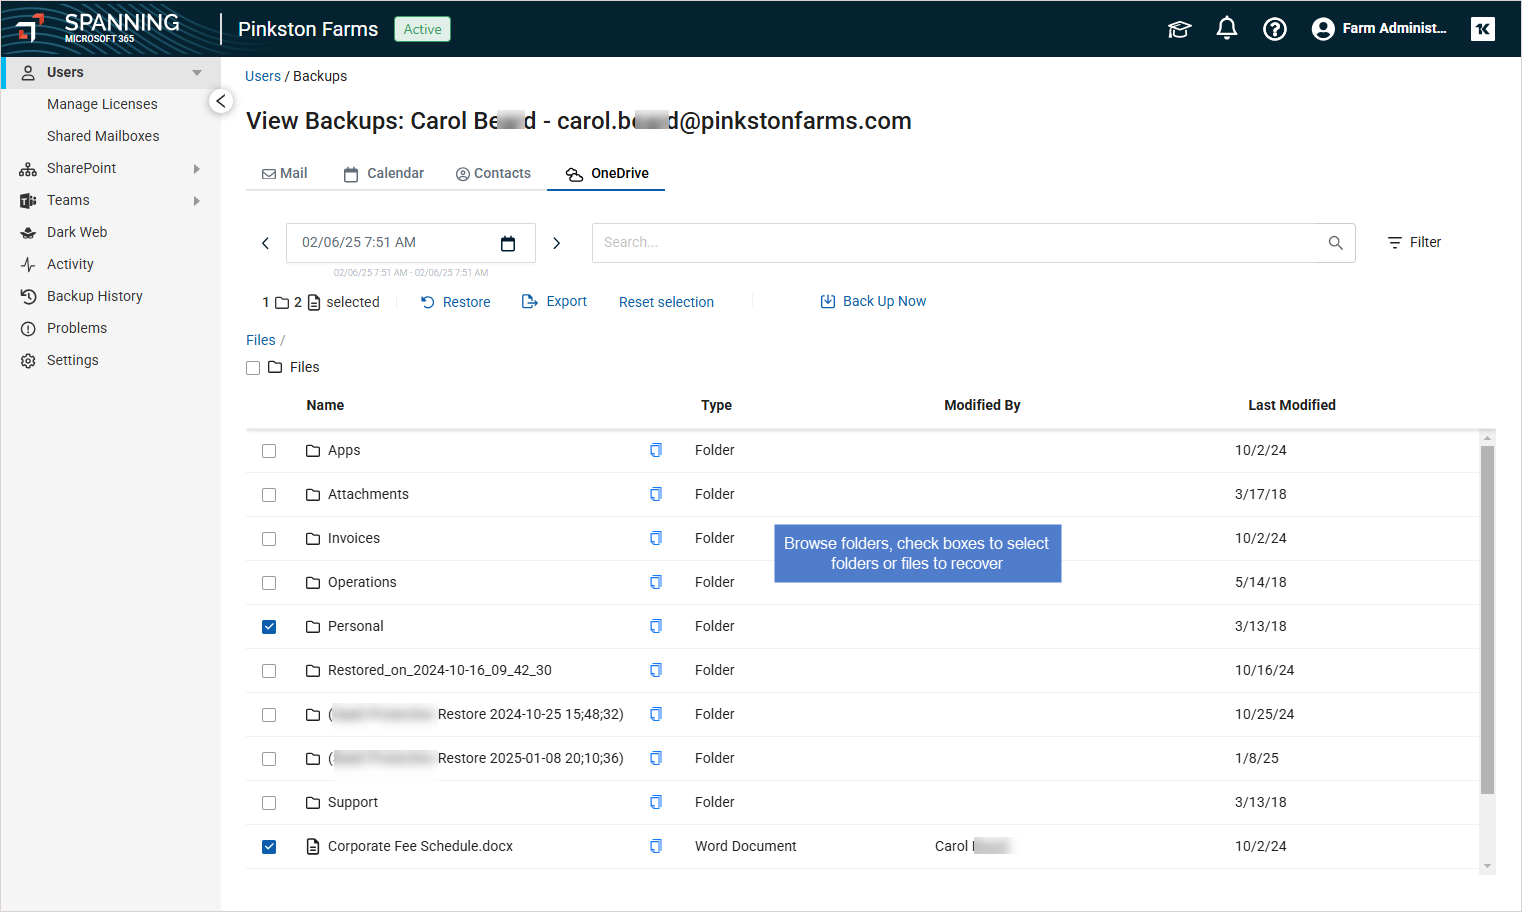
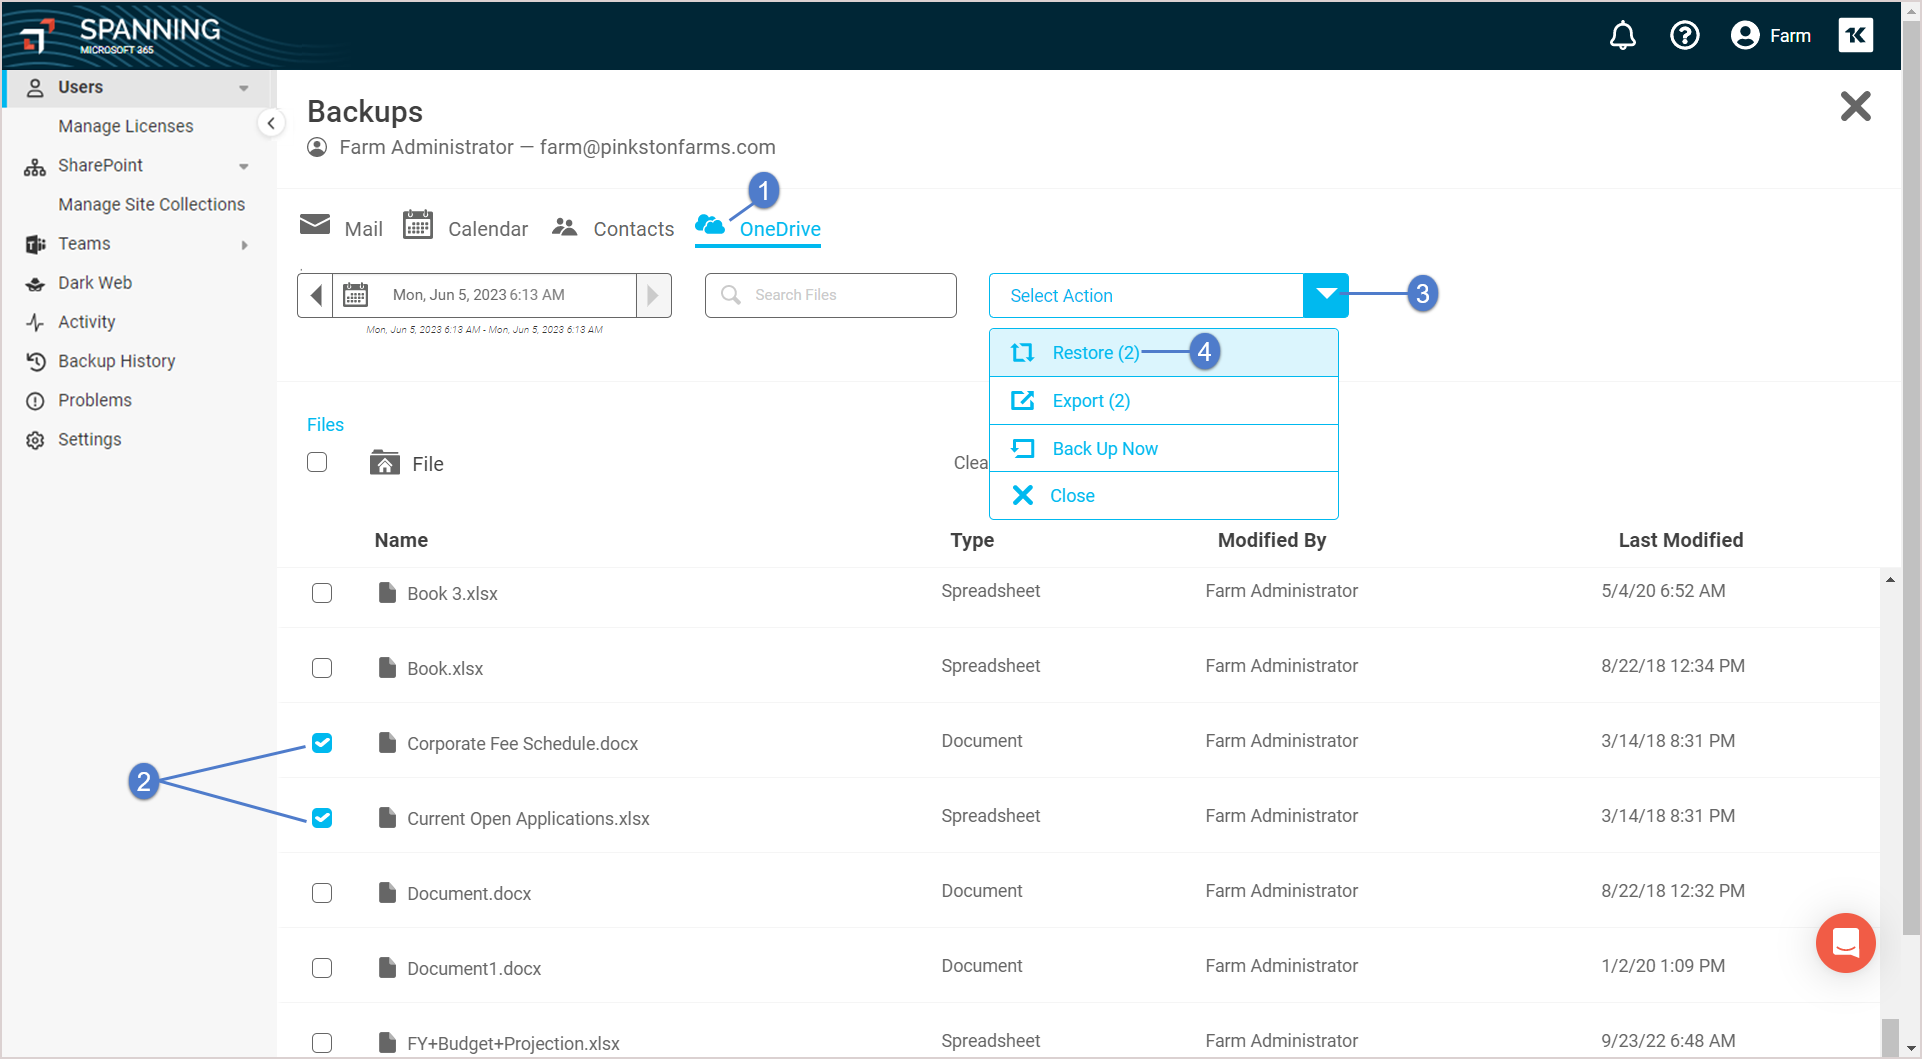
- On the OneDrive tab, search for and select the item(s) you want to restore. You can select one or more files and folders.
You can search by folders, point in time, or by using the Search field. You can use one search method or multiple methods to help you find what you're searching for:
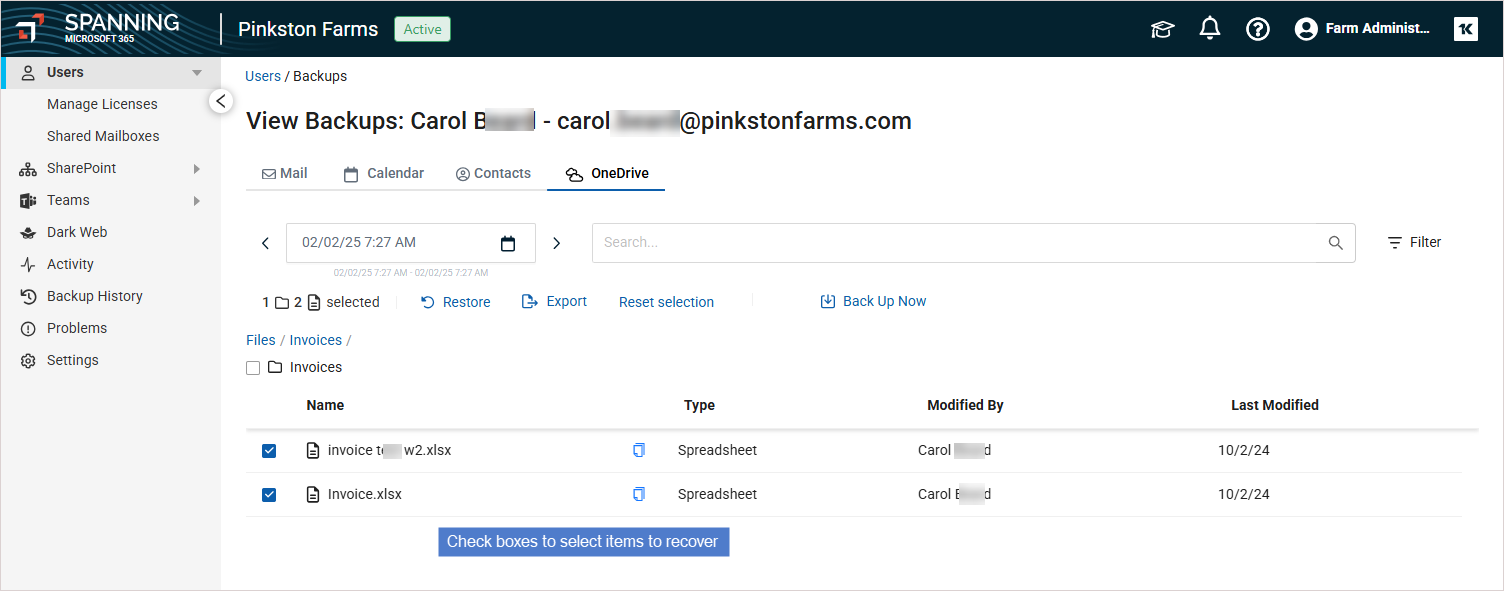
- Folders – Your OneDrive structure is replicated in Spanning Backup. Browse these folders just as you would in OneDrive. Check boxes to select folders or files.
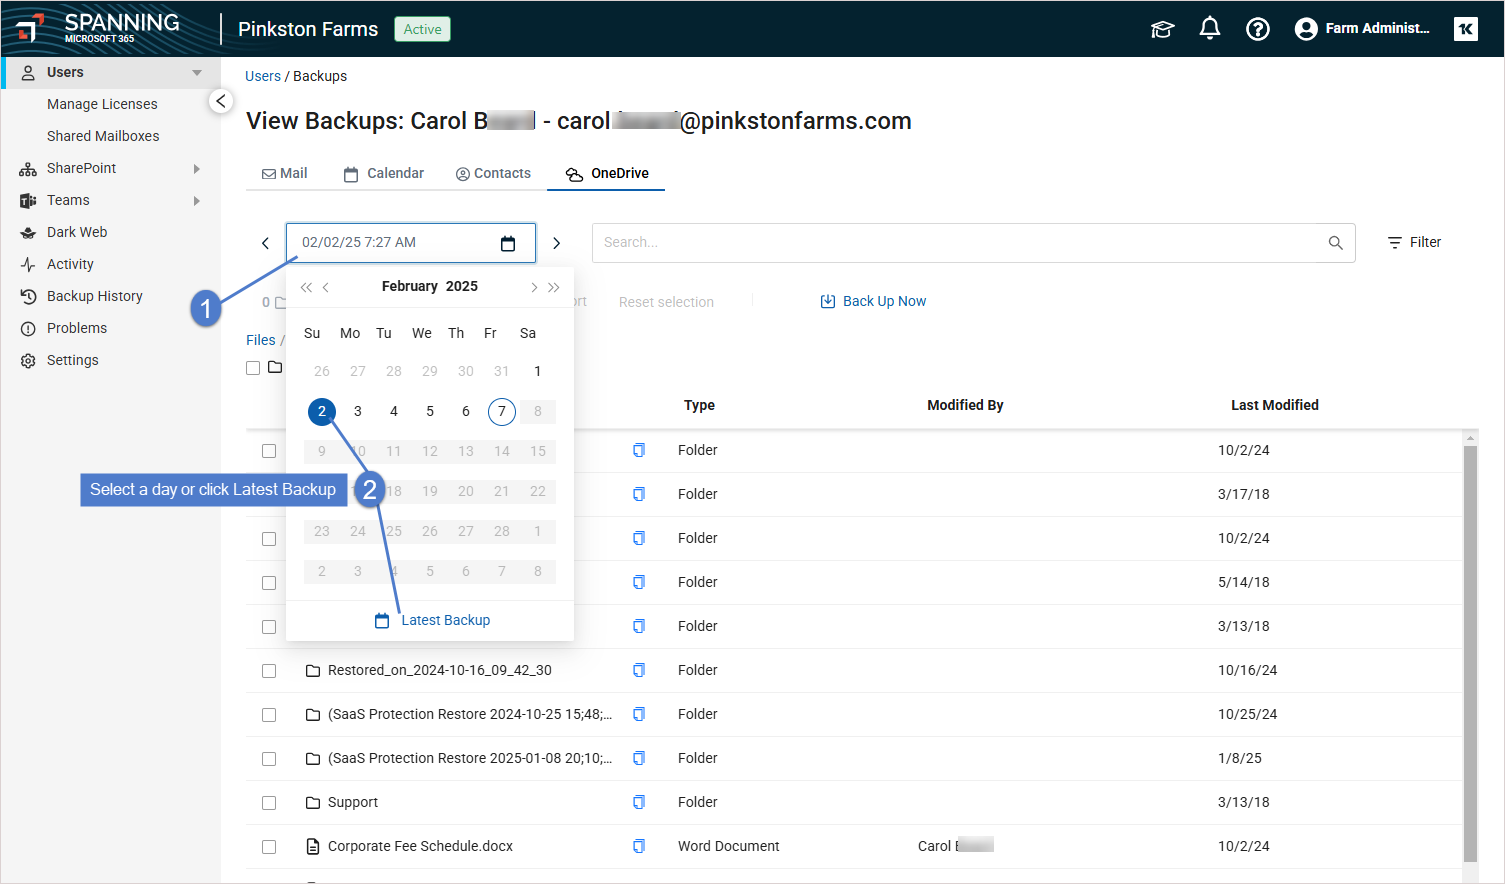
- Point in time – Choose a date in the past when you know the file was still present. For recently deleted items, you can click the Latest Backup button. Check boxes to select items.
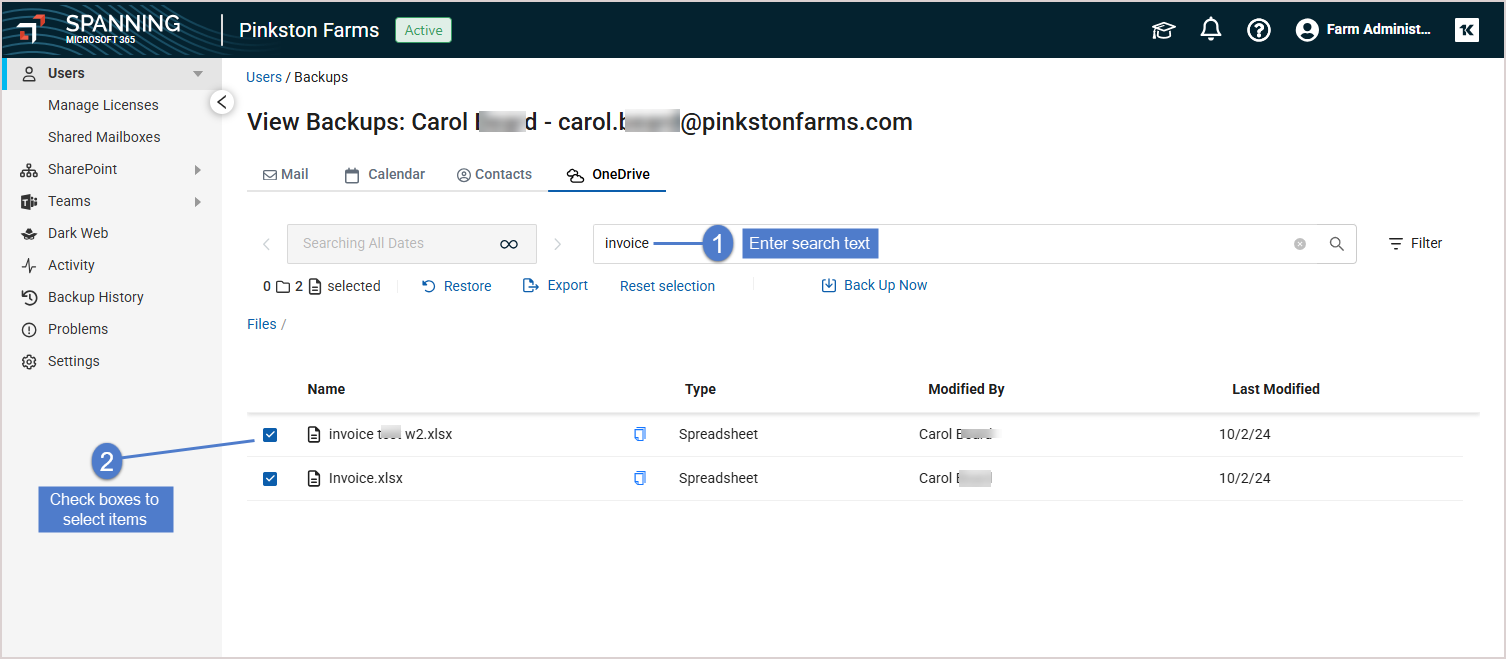
- Search – You can type into the Search field and Spanning automatically starts searching all your filenames and folders for a match. This method searches all backups. Check boxes to select items.
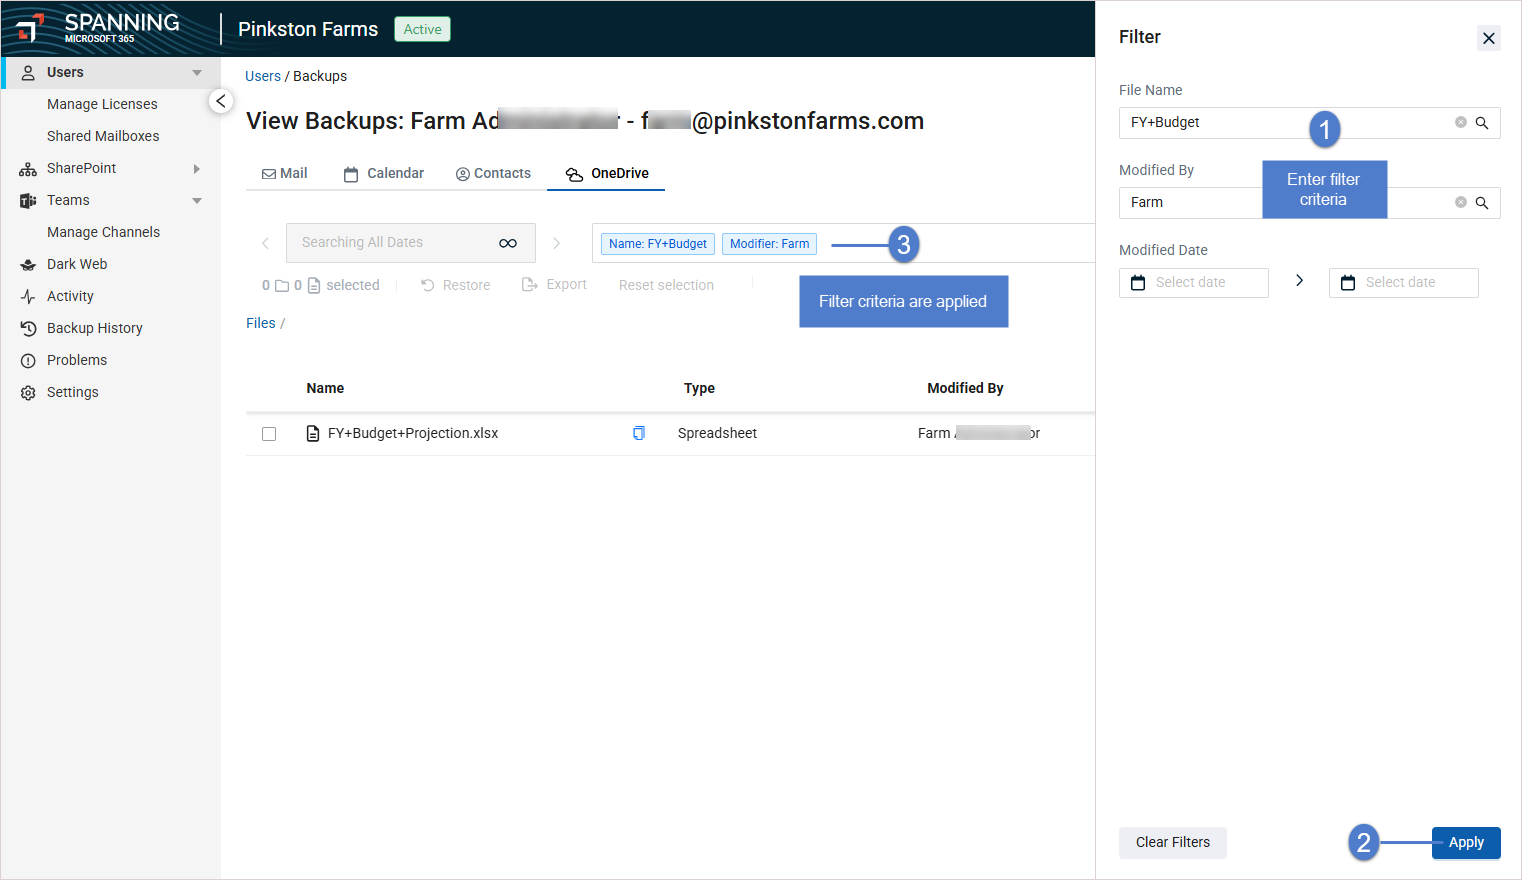
- Search Filter – Use the filter to search only folders or only files with the text you enter. Or to search for folders or files modified in the specified date range.
- Select a version from search results – Hover over an item and click See Versions to restore a specific version of the item.
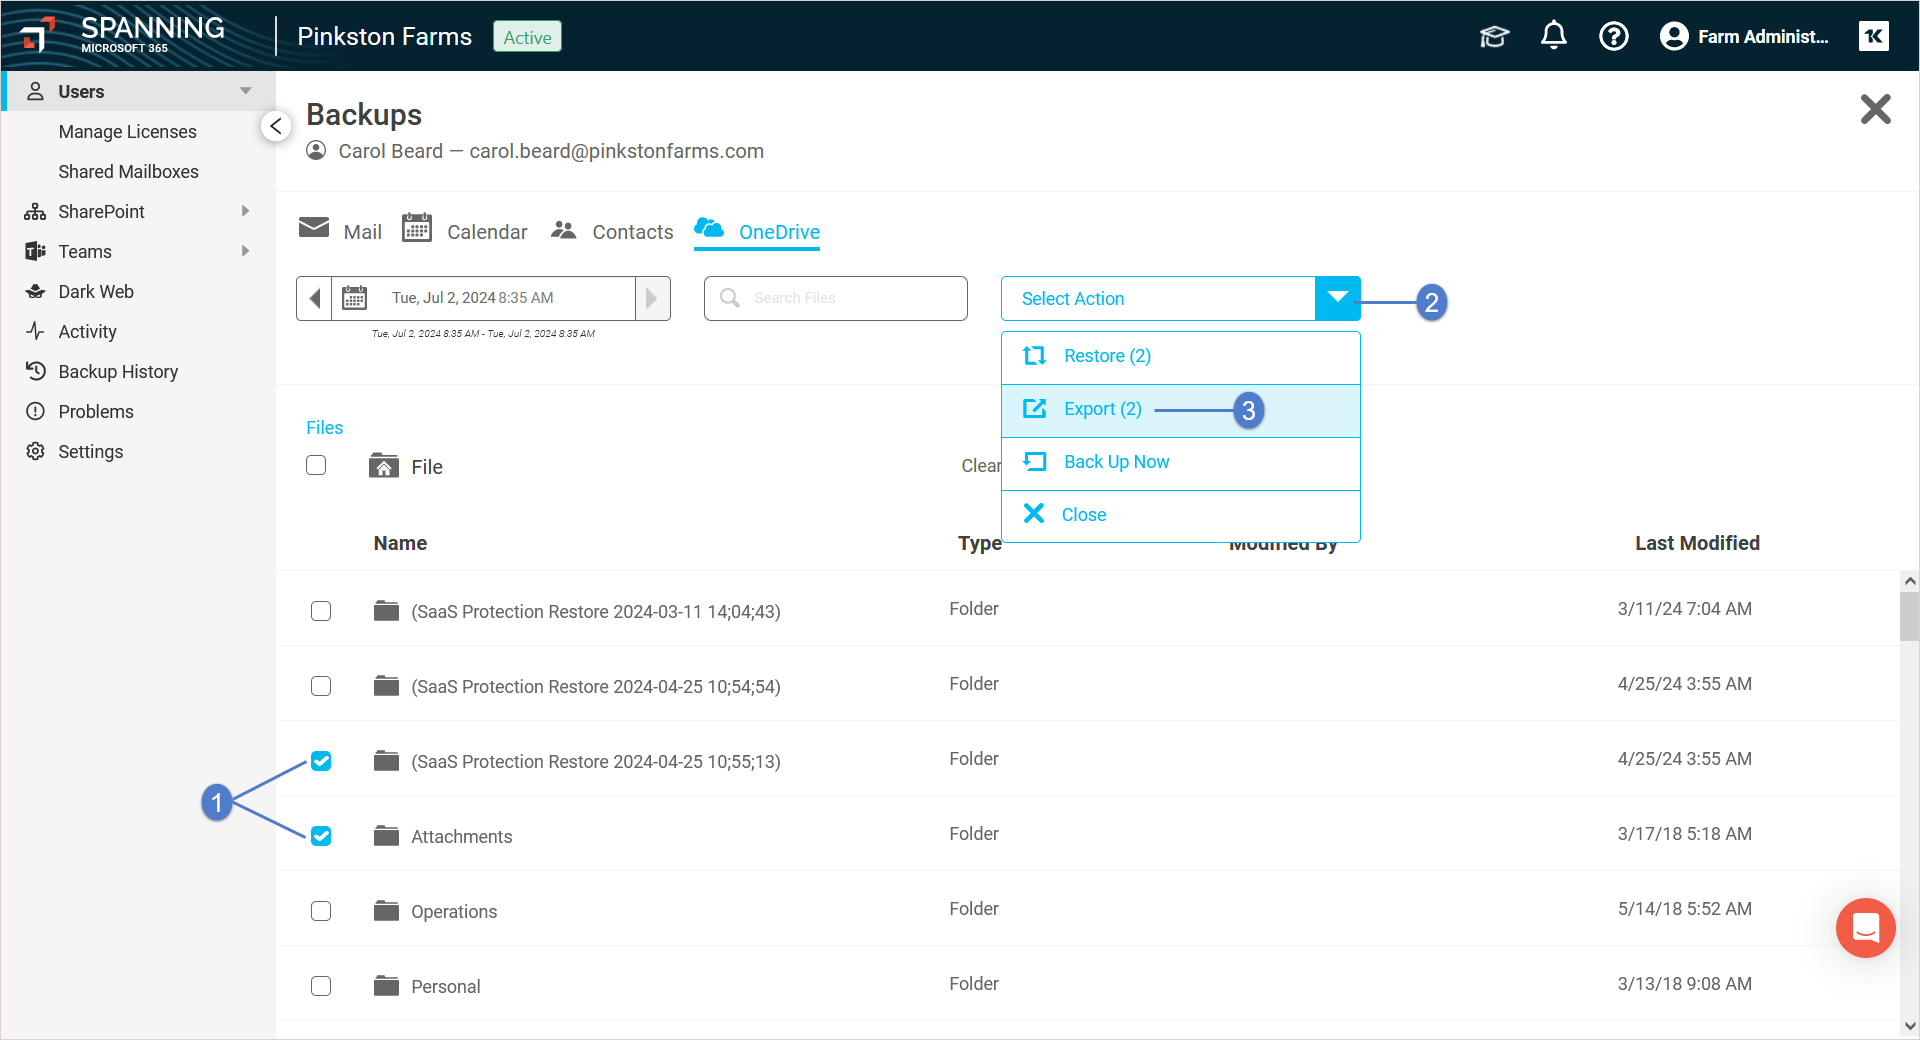
- Once you've select items, do one of the following:
- To restore, click Restore and continue with the steps in this procedure.
- To export selected items into a compressed file, proceed to To export OneDrive data.
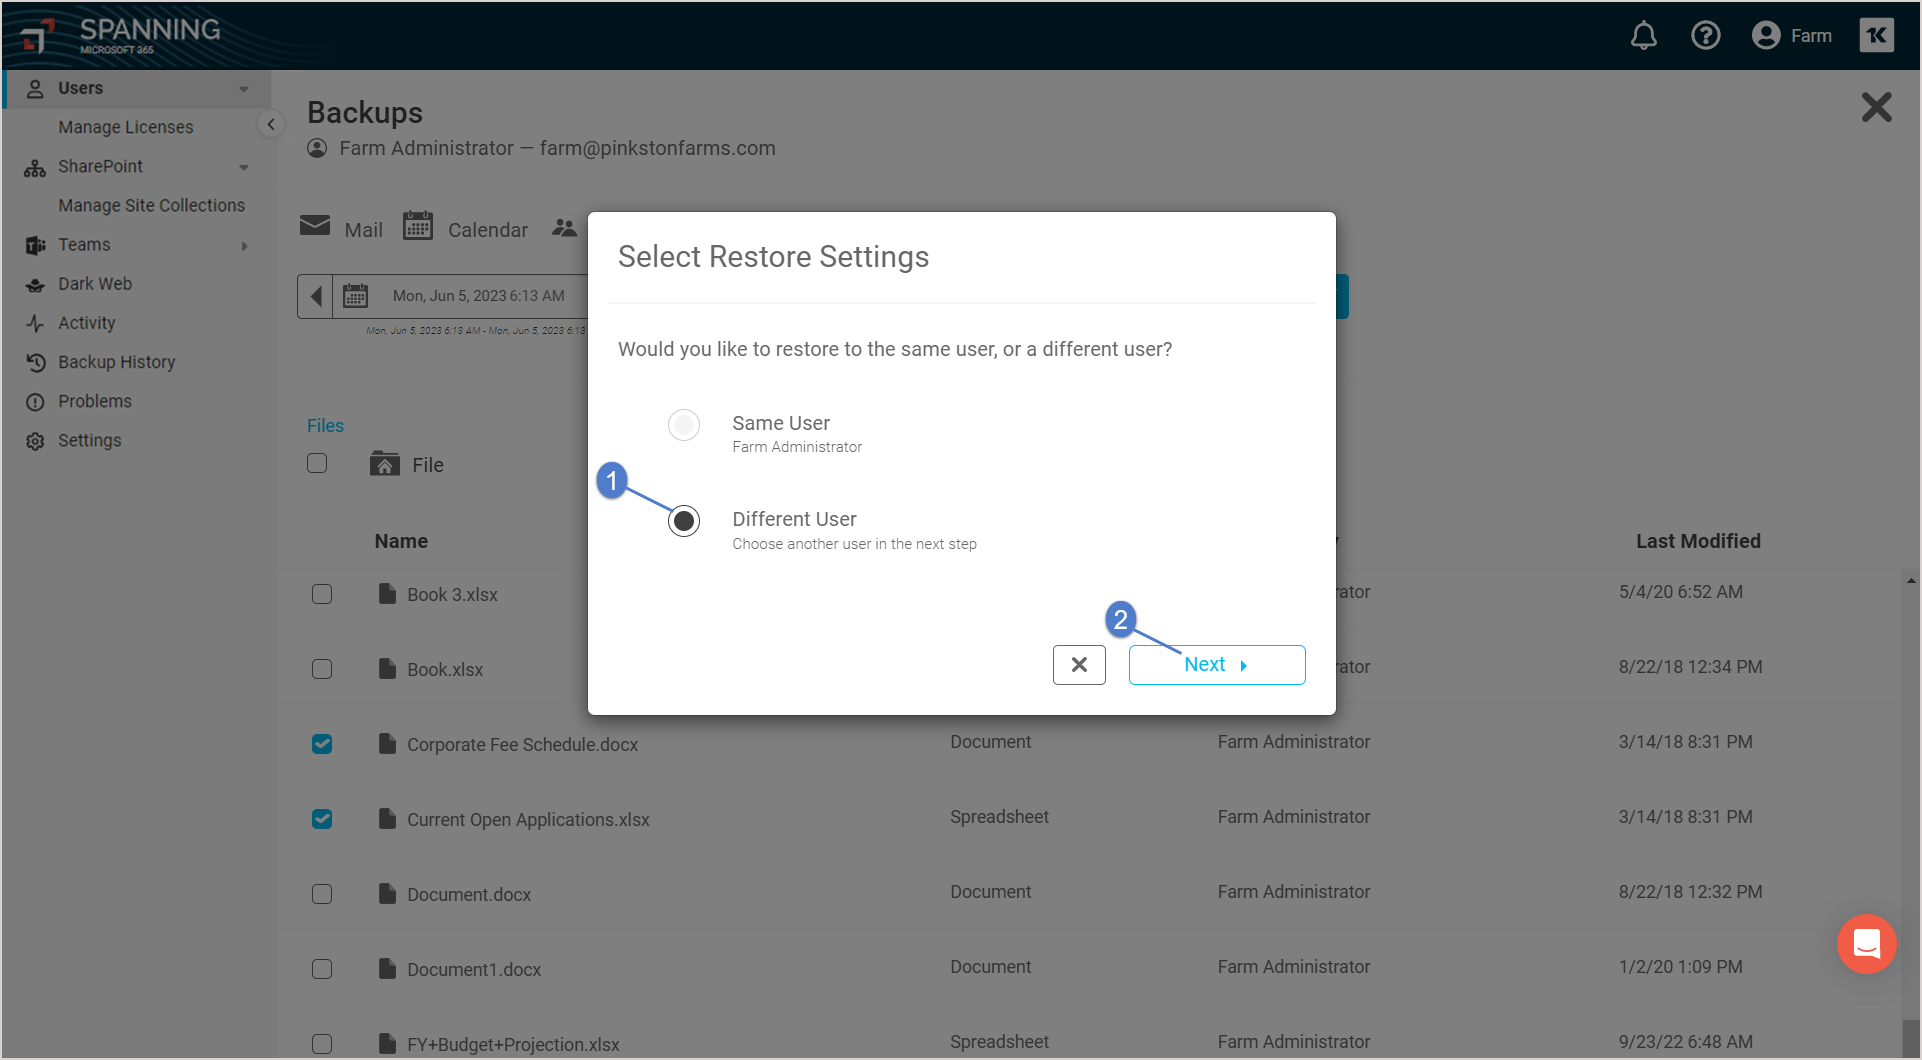
- Choose whether to restore to the same user’s account or select a different user’s account within the same tenant.
NOTE Spanning admins can perform cross-user restores. Non-admin users can only restore their own backup data to their own account.
- Click Next.
- Click Confirm. A notification displays at the top of the page indicating that the restore was initiated.
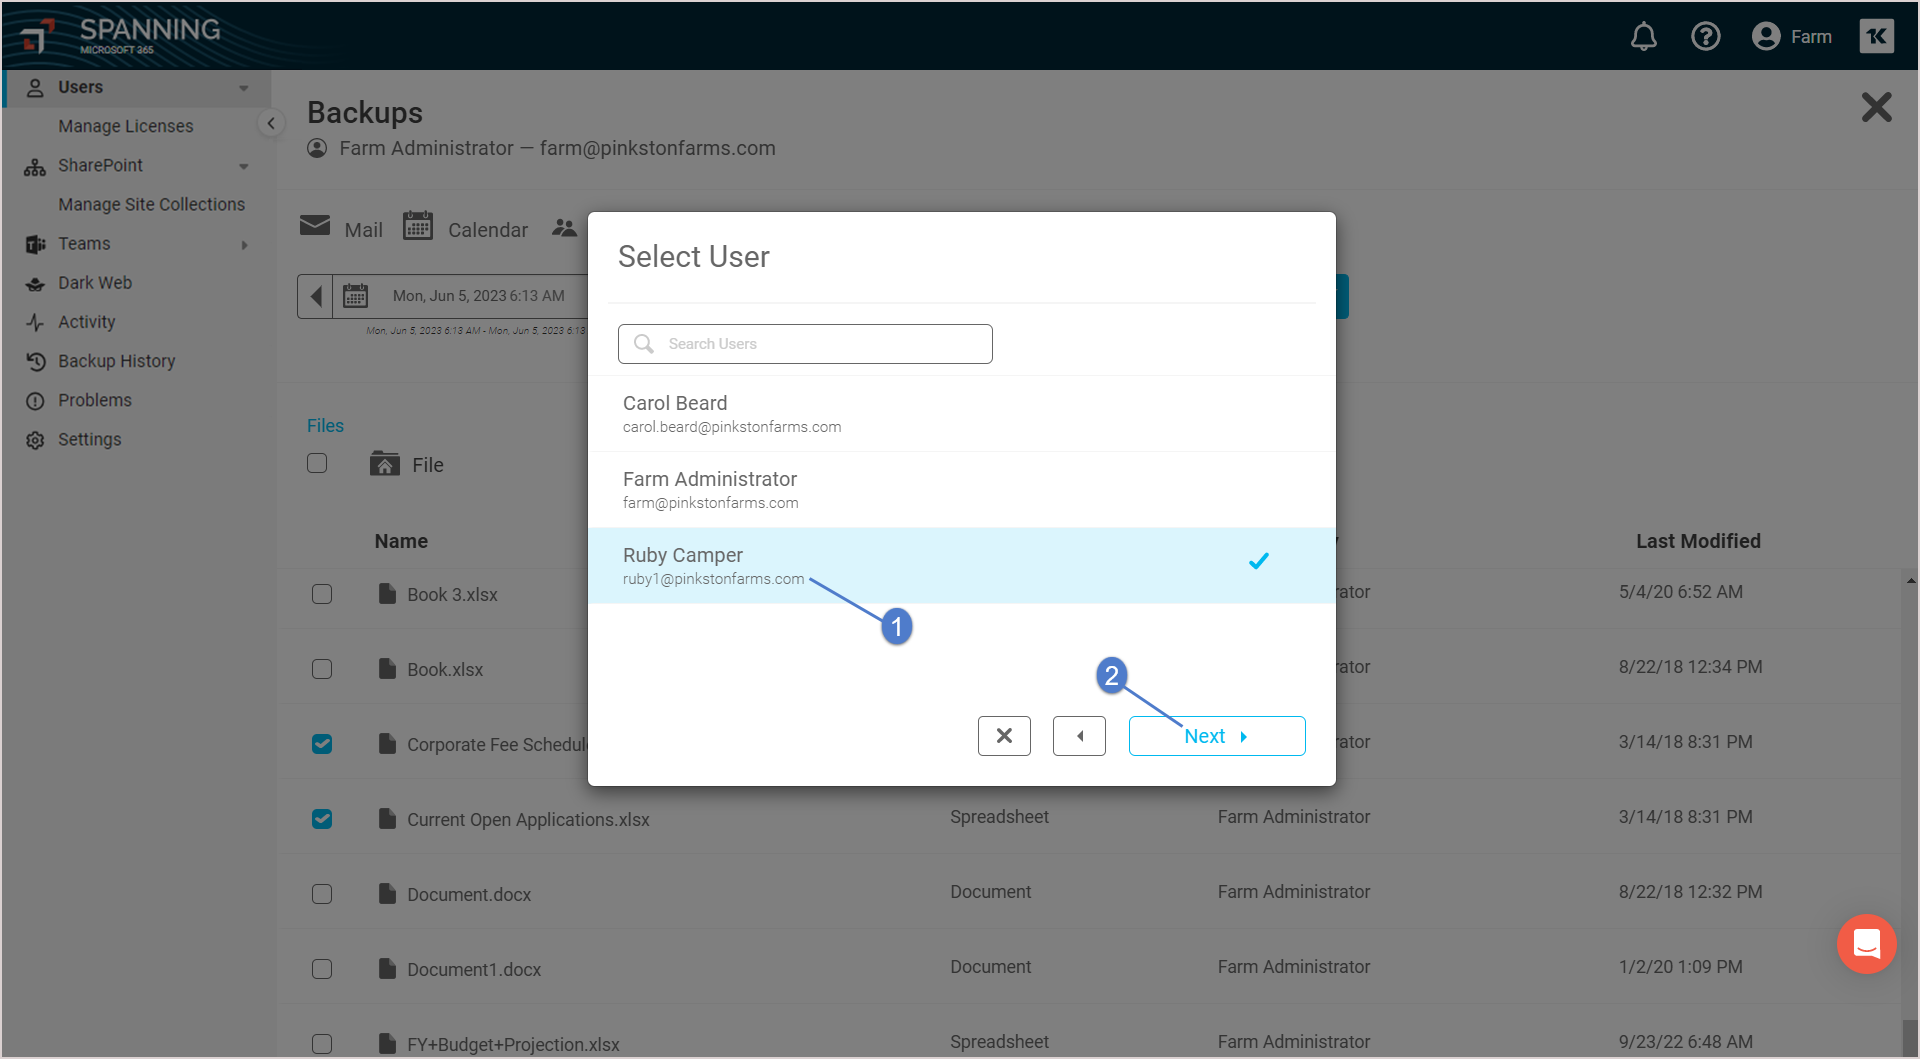
- When the restore is complete, you receive an email notification. Data is restored into a newly created folder in the user’s active Microsoft 365 OneDrive account, titled Restored on (date).
NOTE OneNote Notebooks are fully supported by Spanning Backup for Microsoft 365. Due to the design of Microsoft OneNote they do require an extra step to restore them back to their original location. For details, see our guide for Restoring Microsoft OneNote.
- Once you’ve selected the items you want to restore on the OneDrive tab, click Export.
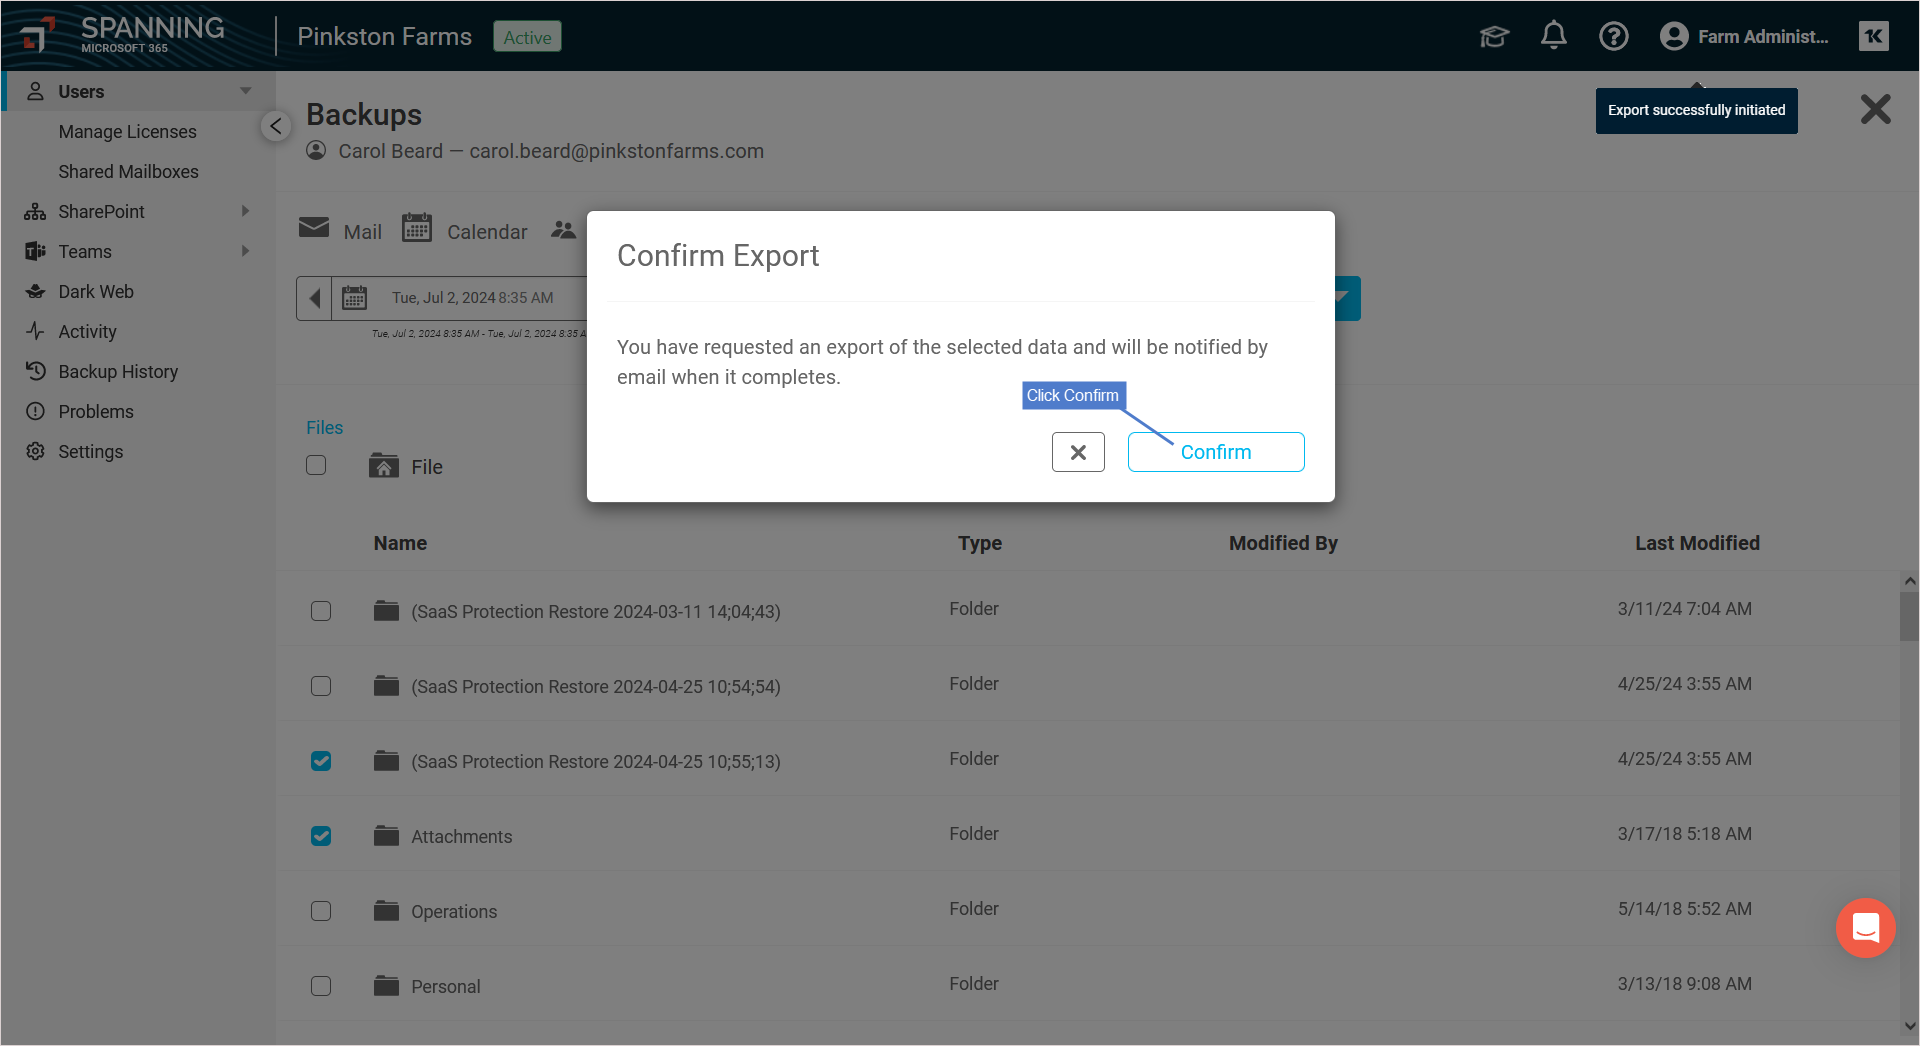
- Click Confirm. A notification displays at the top of the page indicating that the export was initiated.
- When the export has finished compressing, you receive an email notification. The export displays on the Activity page in the Past items.
- Click the activity to view details about the export.
- Click the Export link to save the export to your local hard drive.
NOTE If the Export link is not clicked, it expires 14 days after the export has finished compressing. After the Export link has been clicked, it is disabled in 24 hours.
- The export is downloaded as a compressed .zip file. After you extract the file (WinZip for Windows users, Archive Utility for Mac users), all files are in the same format as they were in OneDrive.
