Spanning Backup for Microsoft 365 protects the document libraries and files contained within site collections in SharePoint. As part of the backup, Spanning discovers all site collections in SharePoint, including Team Sites, Group Sites, and Microsoft Teams, and then conducts a backup of the document libraries and files in your tenant.
To start running backups, the SharePoint backup type must be enabled and you must enable backups for each site collection you want to protect. The SharePoint backup type is enabled by default. (To check your current setting, see Backup & Security tab settings.) Once enabled, backups run automatically each day, and you can run a manual backup at any time.
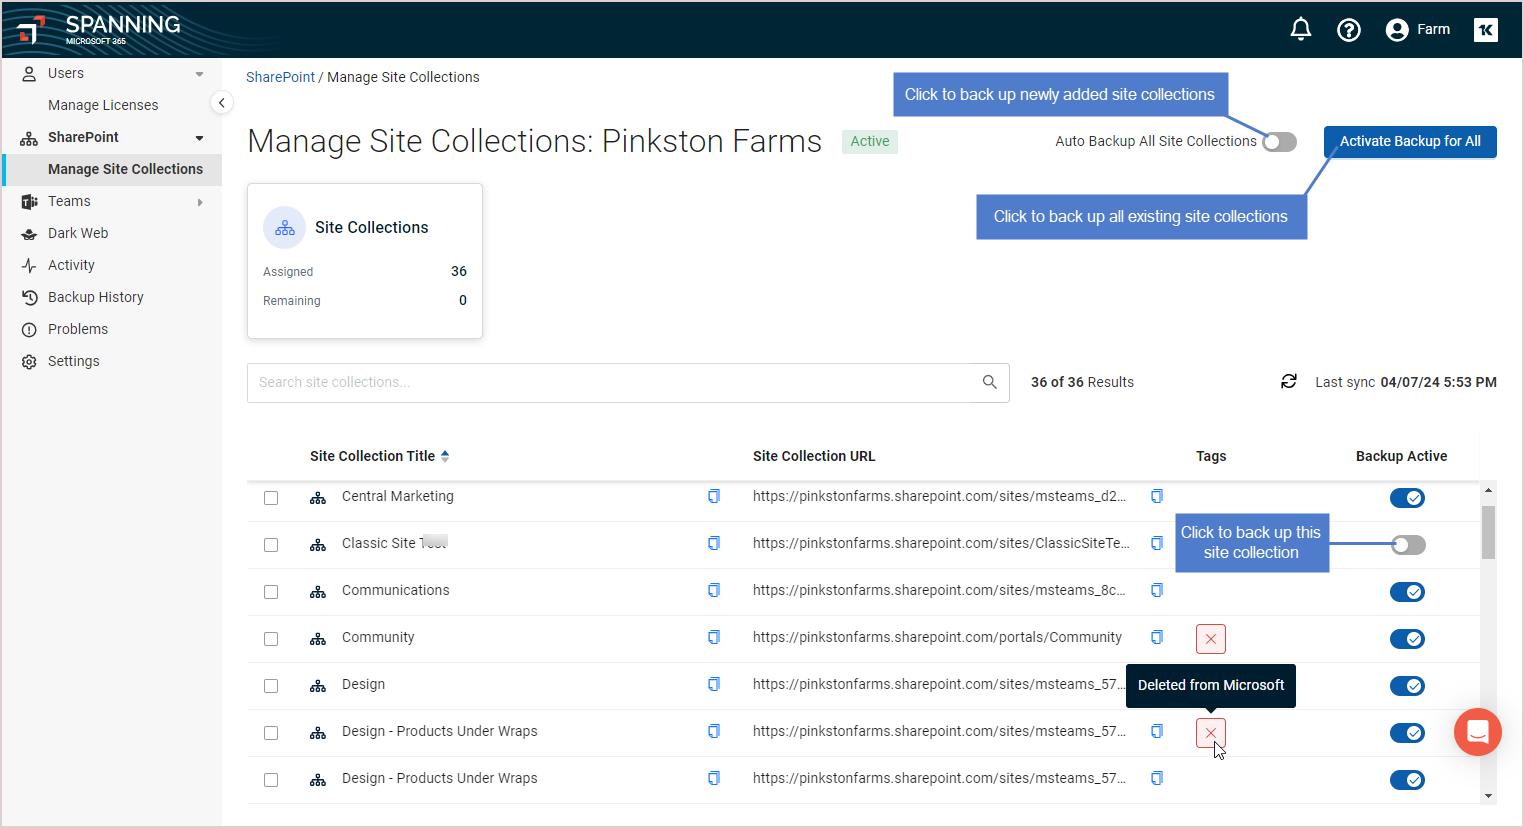
You can enable backups for all site collections or select individual site collections to include in the backup process. This is great for scenarios where you don’t want to include specific site collections in your backups. You can also choose to backup all new site collections, which preserves your existing site collection settings and protects any newly discovered site collections automatically.
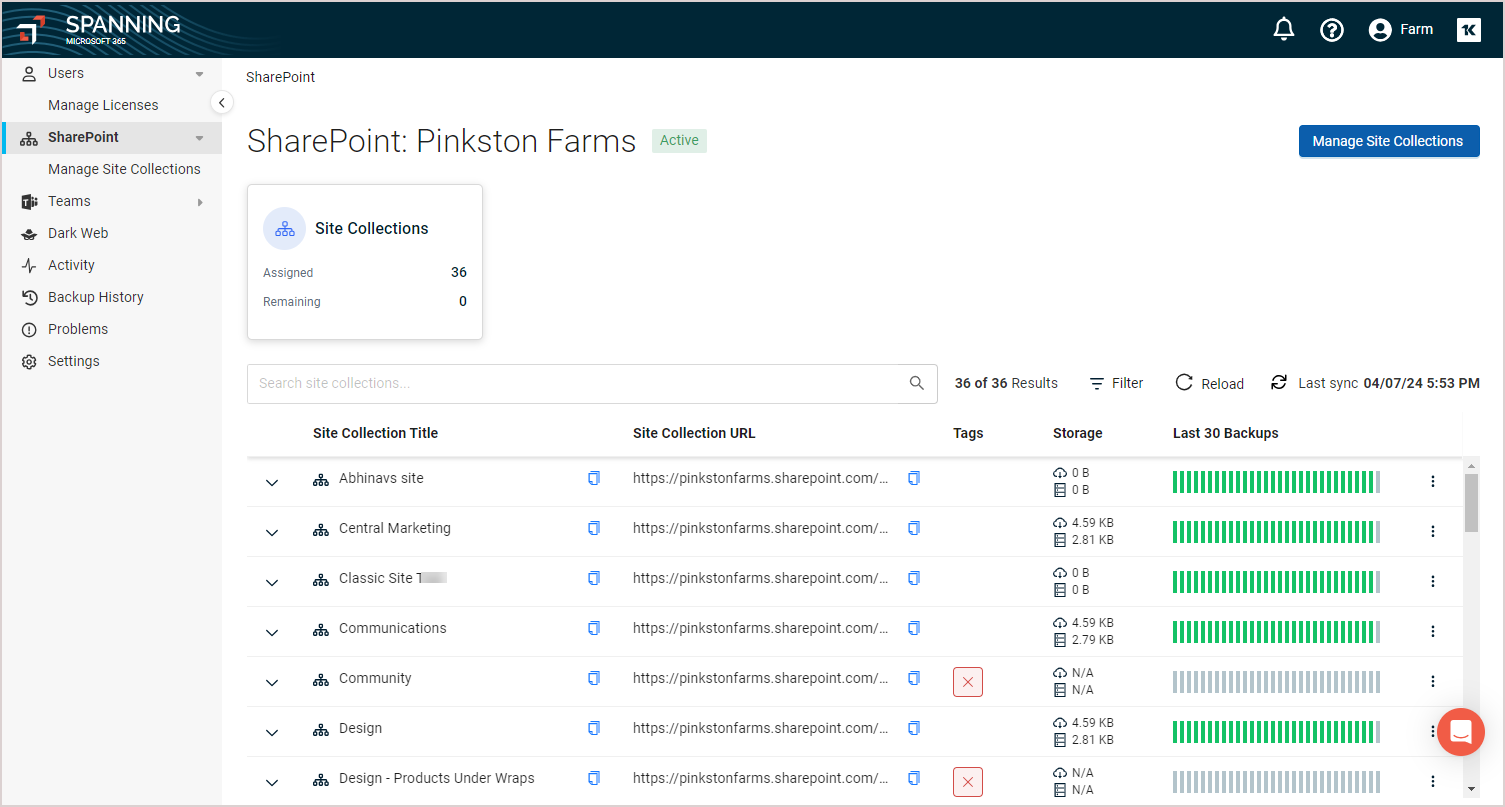
SharePoint backup is only accessible to Spanning administrators. Select the SharePoint tab on the left to manage your SharePoint backups.
See these procedures to protect SharePoint data:
NOTE The SharePoint backup type must be enabled to run SharePoint backups. To check your current setting, see Backup & Security tab settings.
- Log into your Spanning Backup for Microsoft 365 account as an admin user.
- Click SharePoint.
- Click Manage Site Collections.
- Choose the toggles next to the site collections you want to protect or click Activate Backup for All to select them all.
NOTE During the trial period you are limited to 10 site collections. Once you have purchased Spanning Backup for Microsoft 365, you can protect all site collections (including new site collections automatically).
NOTE The SharePoint backup type must be enabled to run SharePoint backups. To check your current setting, see Backup & Security tab settings.
- Log into your Spanning Backup for Microsoft 365 account as an admin user.
- Click SharePoint.
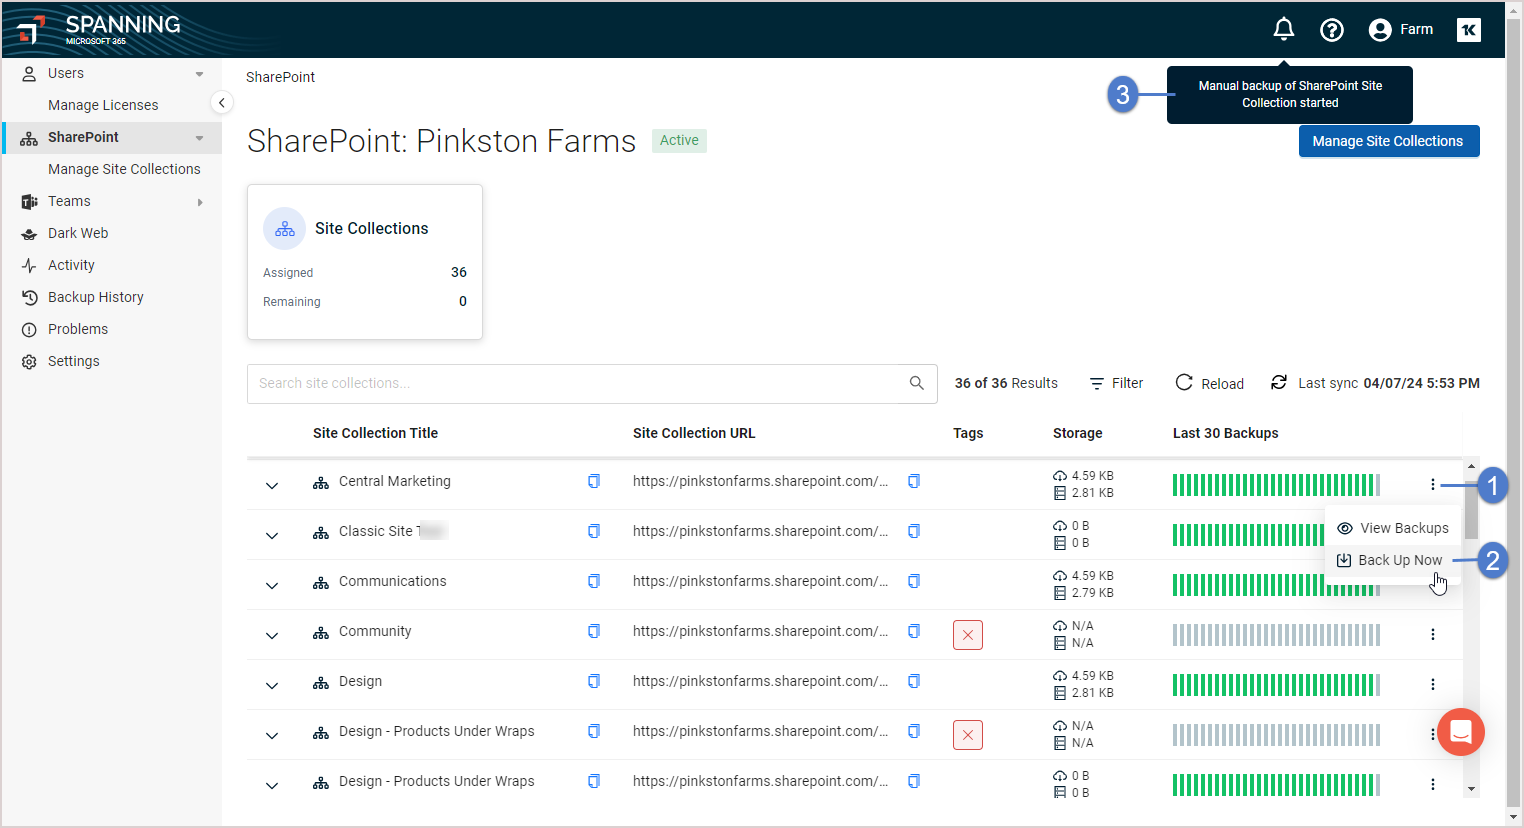
- Locate the site collection you want to back up. To filter the list by site collection name or URL, enter text in the Search Site Collections Title/URL field.


