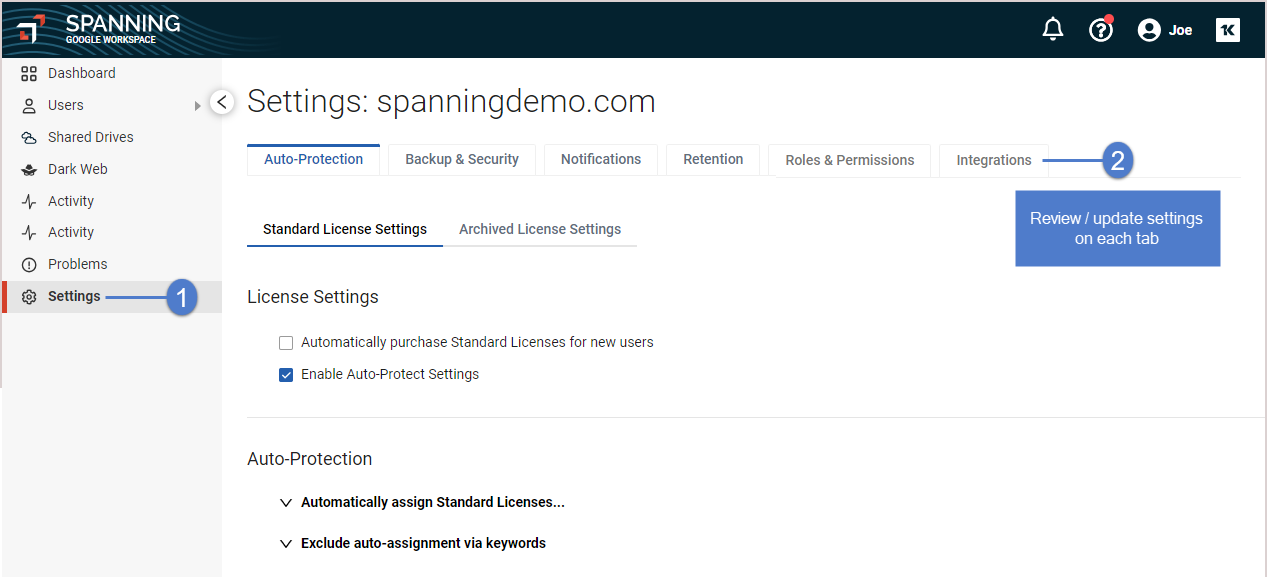
Once you assign licenses, you can configure or modify administrator settings using these steps:
- Log into Spanning Backup for Google Workspace as an admin user.
- Click Settings.
- Review the settings on each tab and modify as needed.
See these topics for details:
Automated license assignment is one way to ensure user data is protected without delays. Spanning admins can specify which sets of users are automatically protected.
License Settings
You have the option to enable or disable one or both of the following automated licensing features:
- Automatically purchase Standard Licenses for new users

- Enable Auto-Protect Settings: Refer to the Auto-Protection section to configure license assignment settings.
Auto-Protection
If the Enable Auto-Protect Settings check box is selected in License Settings, configure the settings under Automatically assign Standard Licenses.
Enable one of the following options:
To all new users
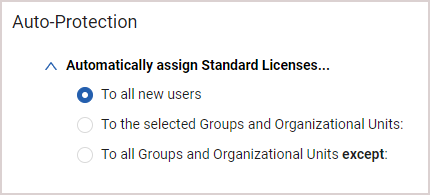
Licenses will be automatically assigned to every new user in the domain.
To the selected Groups and Organizational Units
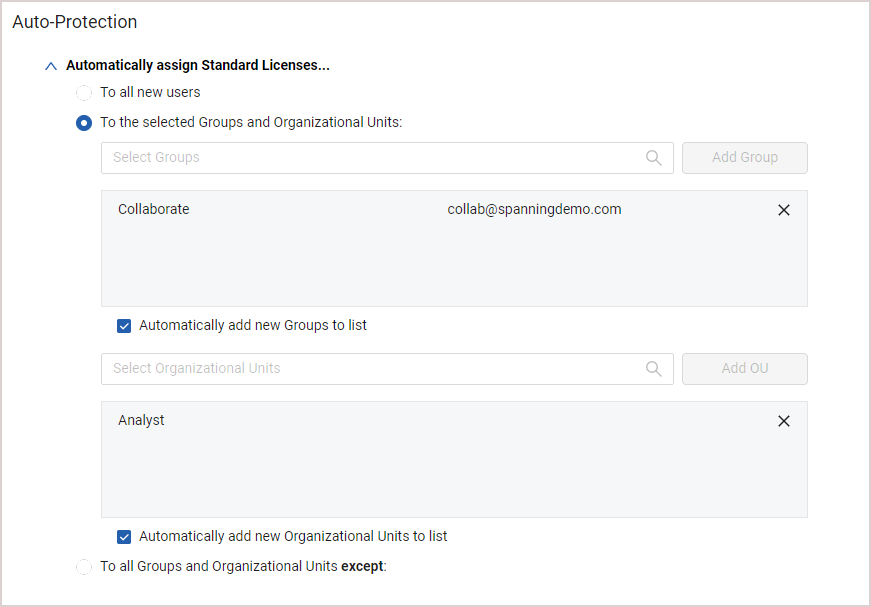
Licenses will be automatically assigned to users who belong to the groups and organizational units (OUs) selected in this section. Select a group or OU from the respective drop-down menus and click Add Group or Add OU, respectively, one at a time.
- Automatically add new Groups to list: If selected, users added to newly created groups are automatically assigned licenses.
- Automatically add new Organizational Units to list: If selected, users added to newly created OUs are automatically assigned licenses.
To all Groups and Organizational Units except
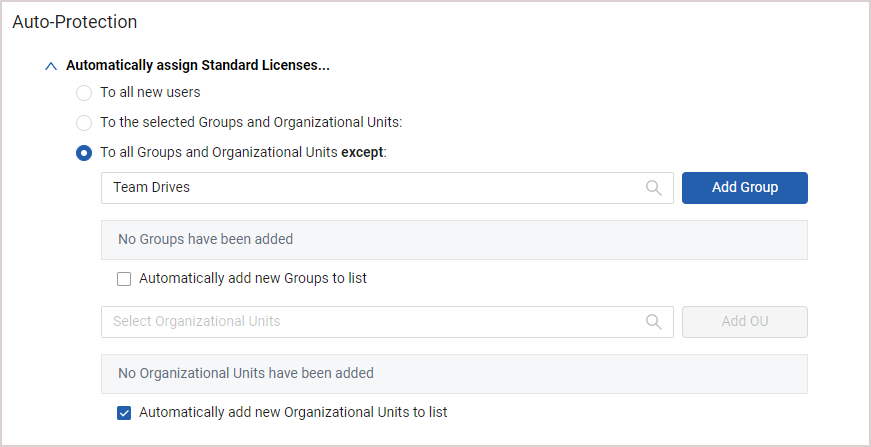
Licenses will be automatically assigned to all users except those who belong to the groups and organizational units (OUs) selected in this section. Select a group or OU from the respective drop-down menus and click Add Group or Add OU, respectively, one at a time.
- Automatically add new Groups to list: If selected, users added to newly created groups are not automatically assigned licenses.
- Automatically add new Organizational Units to list: If selected, users added to newly created OUs are not automatically assigned licenses.
(Recommended) On the Notifications tab, enter a number in the Depletion Notification quantity field so that Spanning sends a notification when your available license count reaches the specified threshold. (See Notifications tab settings.)
To stop receiving these notifications, set the quantity to zero (0).
Click Save.
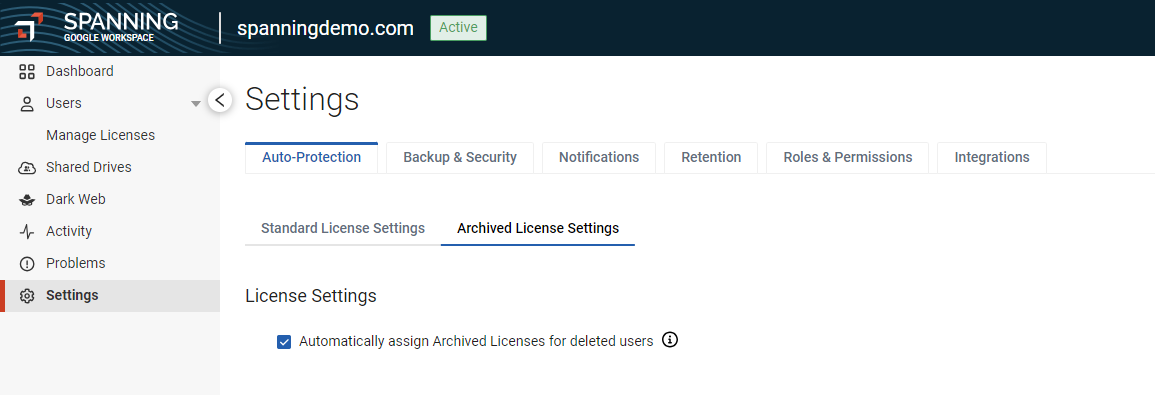
Archived License Settings
Selecting the Automatically assign Archived Licenses for deleted users check box automatically applies an archived license to a licensed user that has been deleted by Google.
By enabling this feature, when a user being actively protected by a Spanning Backup standard license is deleted from your Google Workspace tenant and there is an available archived license in your tenant, Spanning automatically assigns this user an archived user license. The user's standard license is removed and becomes available for application to another user.
- If no archived license is available, the deleted user will continue to be protected by their standard license. Existing backup data is retained but no new backups run because the user has been deleted from Google Workspace.
- It can take up to 24 hours to automatically detect a deleted user and assign the archived user license. You can also manually assign an archived license if you do not want to wait the 24-hour period or want to manage licenses in bulk (see Assigning archived licenses to user accounts).
- Any backup data collected prior to the deletion of the user in Google Workspace or the assignment of the archived license (whichever comes first) can be restored to another user or exported.
Spanning runs daily automated backups of this data for each licensed user: Calendar, Contact, Mail, and Drive.
Protection of Shared Drives is included at no additional cost, but must be activated manually.
On the Backup & Security tab, a backup tile displays for each of these backup types.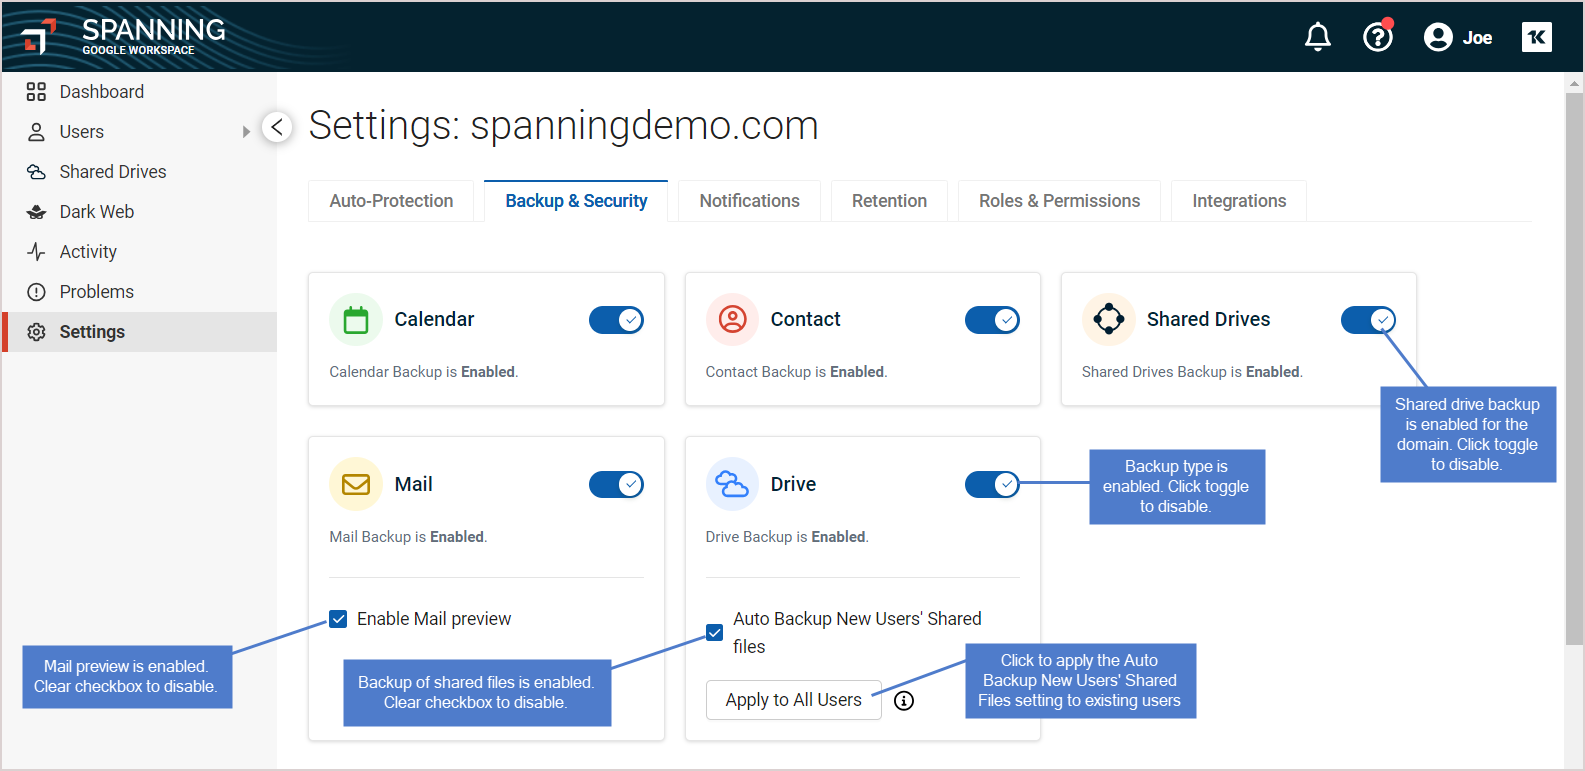
Review the backup tiles and modify these settings as needed:
- Click a toggle to disable or enable a backup type for your Spanning Backup users.
- For Shared Drives, the feature toggle is enabled, meaning that you can activate backups of shared drives as described in Protecting shared drives. You can opt to disable shared drive backup for the domain by disabling this feature toggle.
NOTE If you disable the Shared Drives toggle, no new shared drive backups are taken and any existing shared drive backup data is removed from Spanning after 60 days.
- For Mail Backup, mail preview is enabled, meaning that administrators can see the contents of an email when they click on that email in the Gmail Restore tab. You can disable mail preview by clearing the Enable Mail preview box.
- For Drive Backup, choose whether to back up shared Drive files for new users by default. Whether you check the box for that option or not, you can click Apply to All Users to propagate your chosen setting out to your existing users.
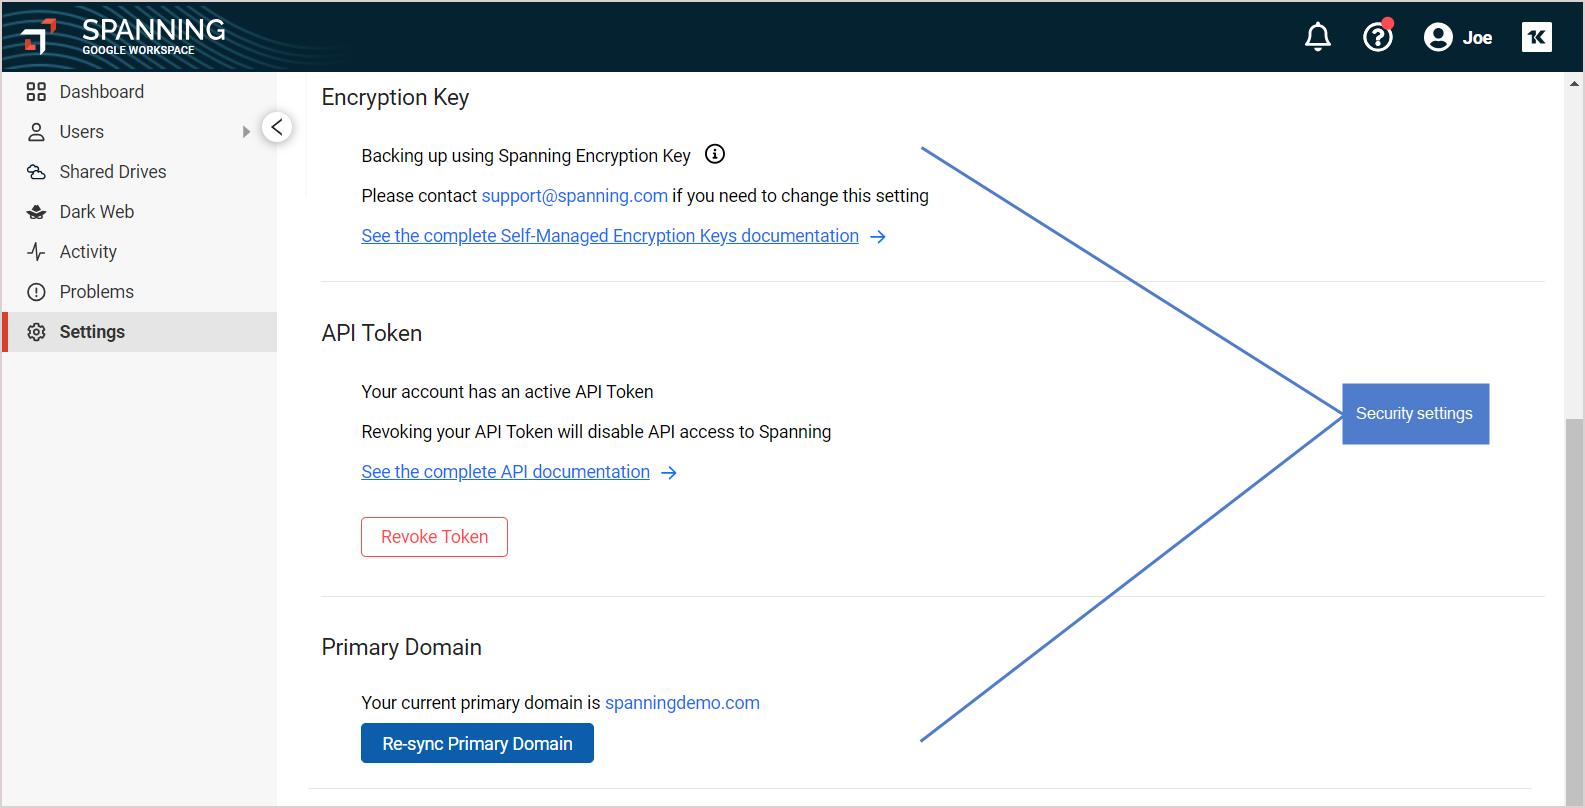
Security settings display below the backup tiles. Review and modify these settings as needed:
- Encryption Key – Shows whether backups are encrypted using Spanning encryption keys or self-managed encryption keys. To change this setting, contact KaseyaOne support.
- API Token – Shows whether your account has an active API token.
- If you’d like to access the Spanning Backup for Google Workspace API, you can enable your API token by clicking Generate API Token. Copy and save the token. You will need to supply this token for all API calls. For details on working with the Spanning API, see https://api.spanningbackup.com/.)
- If you do not want access to the API, click Revoke API Token.
- Primary Domain – Review the Primary Domain. If needed, click Re-sync primary domain.
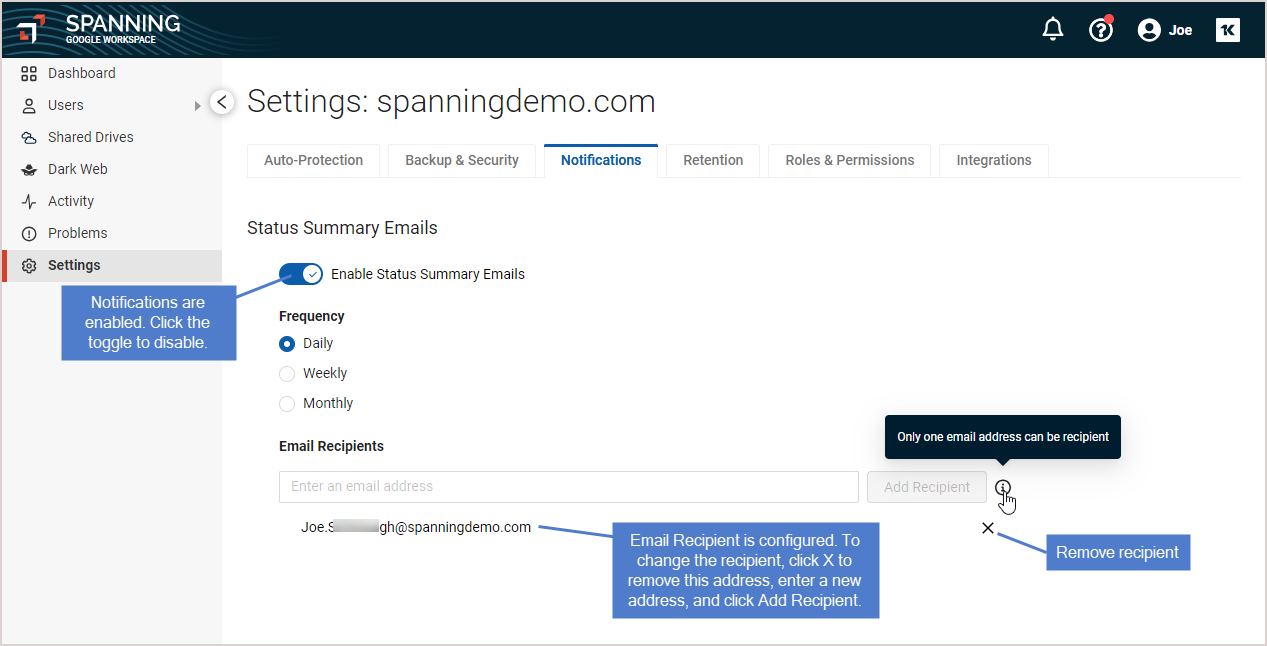
Use the settings on this tab to configure email notifications.
Status Summary Emails are enabled by default. (To disable this feature, click to disable the Enable Status Summary Emails toggle.)
Configure Status Summary Email settings by choosing whether to get emails about the status of your backups Daily, Weekly, or Monthly, and entering the addresses where notifications are sent:
- You can specify multiple user email addresses or distribution lists.
- Click Add Recipient to add an email address.
- To remove an email address, click its X.
Configure Depletion Notification settings to receive notifications in these cases:
- The number of available Spanning Backup licenses falls below the Quantity threshold setting.
- An error occurs during automatic license assignment.
To enable Depletion Notifications, simply enter a number in the Quantity field and click Save.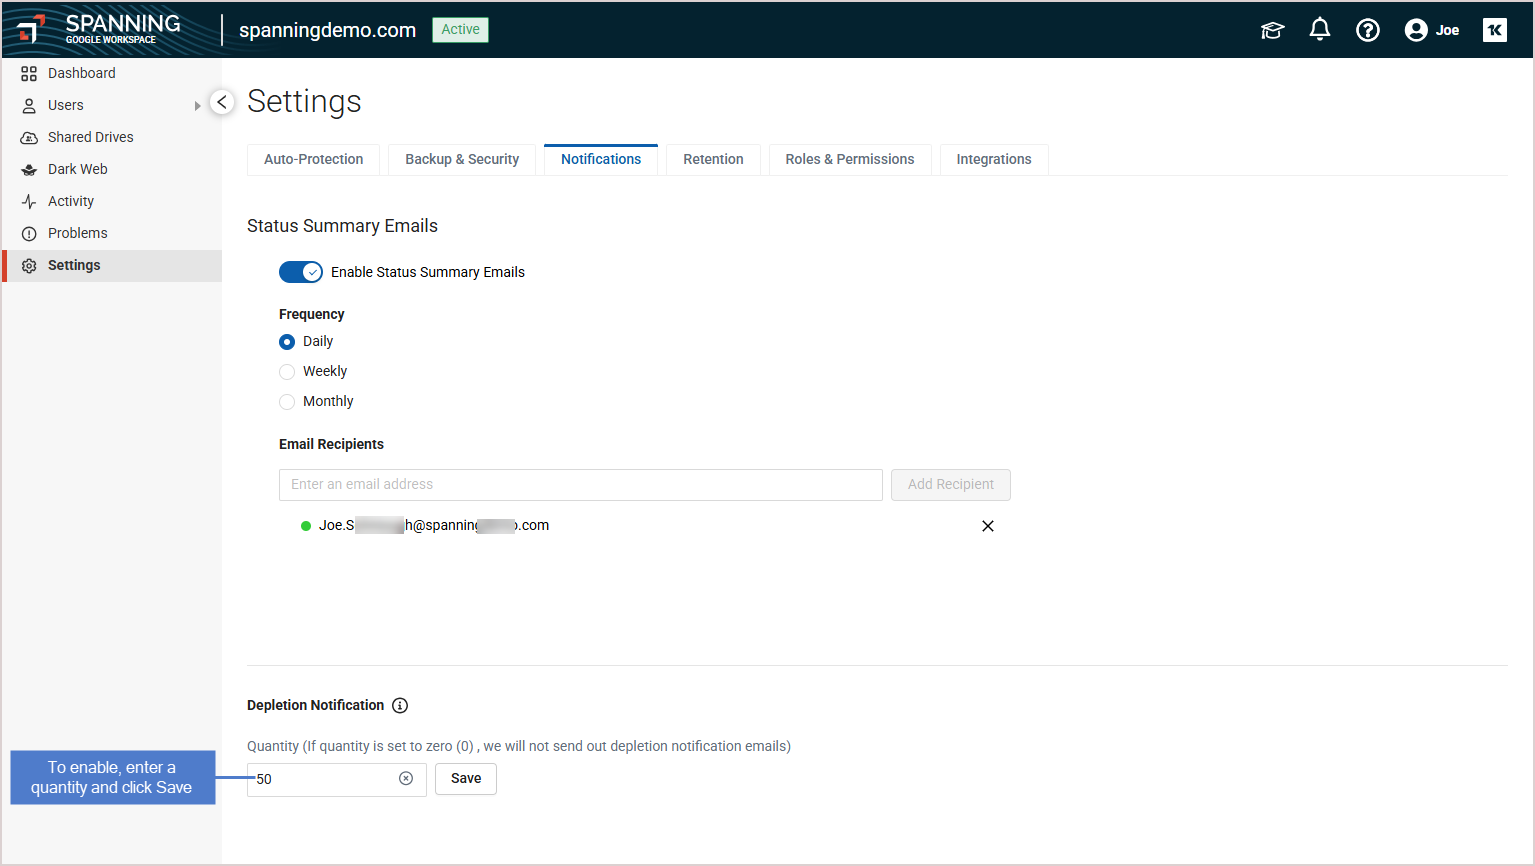
To disable Depletion Notifications, enter 0 (zero) in the Quantity field and click Save.
By default, backups of Mail and Drive data are retained indefinitely. If you need to apply custom retention settings, contact KaseyaOne support for assistance.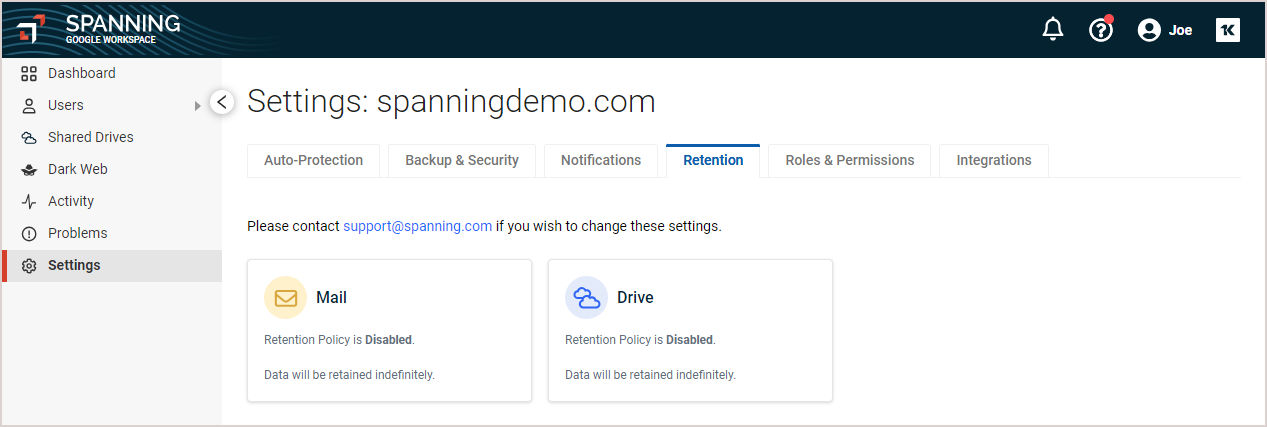
Use this tab to manage Spanning user roles and permissions. Spanning Backup for Google Workspace includes these user roles:
- Non-Admin User – The Spanning admin configures the permissions that are applied to their non-admin users. Depending on the configuration, users may be able to restore or export their own backups and modify their own backup settings. For details, see Configure Non-Admin Users.
- Google Super Administrator – All Google Super Administrators are Spanning Super Administrators, who have full rights and privileges over all end users and other admins. Super Administrators can add any licensed Spanning user as a Super Administrator or Help Desk Administrator.
- Spanning Super Administrator – Spanning Super Administrators have full rights and privileges over all end users and other admins. They have full access to the Spanning Admin Console, including cross-user restores, exports, audit log, and mail preview (if enabled).
- Help Desk Administrator – Help Desk Administrators cannot manage licenses, export full accounts, or download CSVs.
These considerations apply to administrator users:
- The admin user must have a paid seat assigned in order to access the Spanning Backup application. If the admin user does not have a paid seat assigned, they will not be able to create/modify the Spanning Backup user settings or perform on-demand backups/restores/exports for the active Spanning Backup users in the domain. Without a paid seat the admin user can only access the License Manager.
- Spanning Backup administrators do not have to be Google Workspace administrators.
- Help Desk Administrators are able to impersonate any user in the domain, assist with restores, and view subject lines of email - but not email content. Some organizations use the Help Desk Administrator role for HR or Legal teams, as well as to delegate some of the workload for Super Administrators.
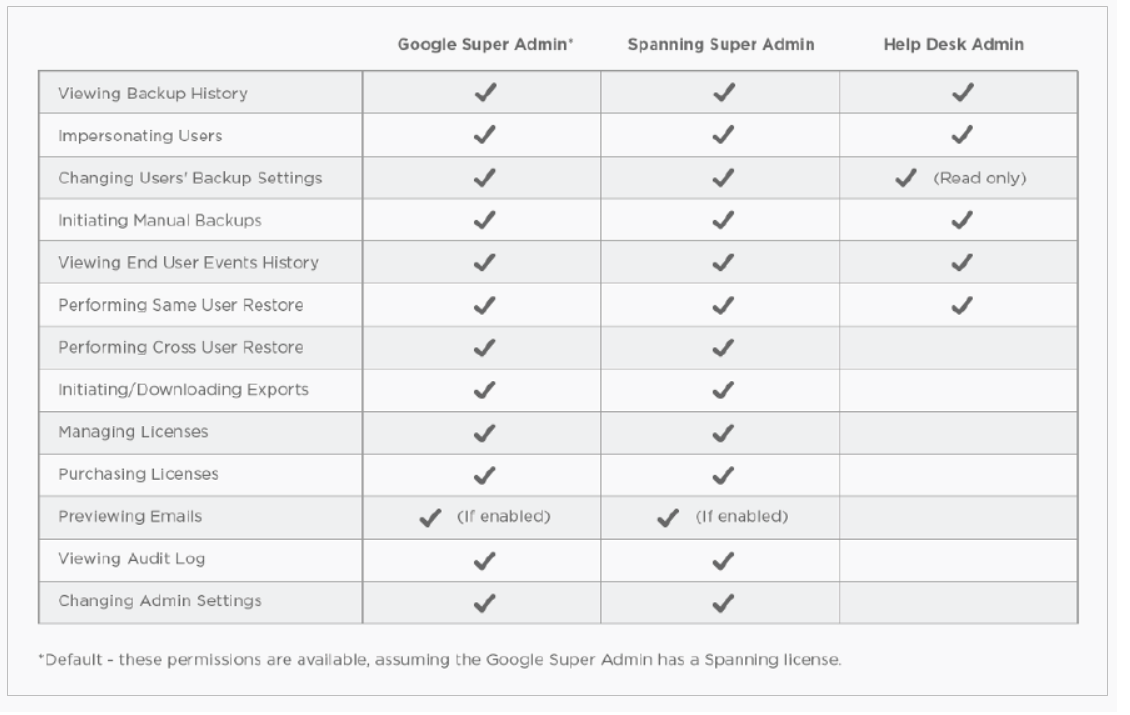
- This chart shows how the Spanning Backup for Google Workspace administrator roles differ:
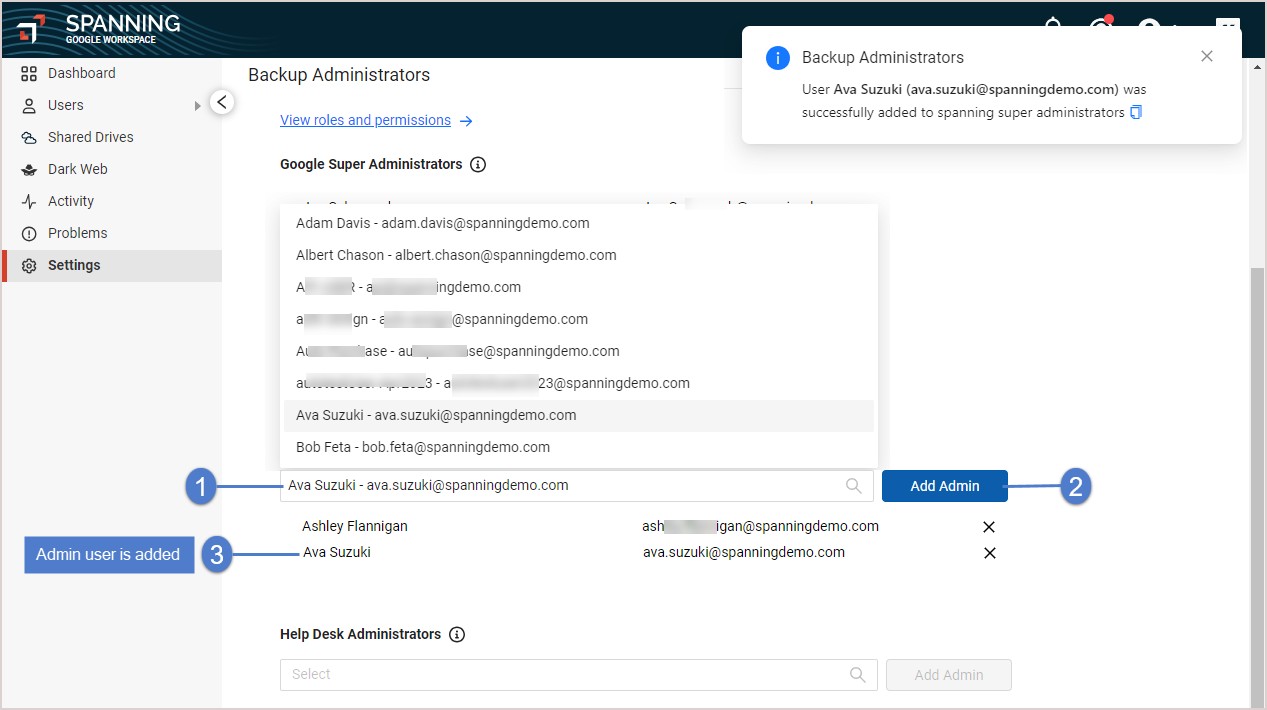
Review your Backup Administrators settings. If needed, add or remove Spanning Super Administrators and Help Desk Administrators as shown below.
To add a Spanning Super Administrator or Help Desk Administrator:
-
Choose a user from the Spanning Super Administrators or Help Desk Administrators Select list.
NOTE If you don't see your user in the list, license the user. Refer to Licensing users.
To remove Admin privileges from a user, locate the user in the Spanning Super Administrators or Help Desk Administrators list and click the user's X. Click OK to confirm. Admin privileges are removed from the user.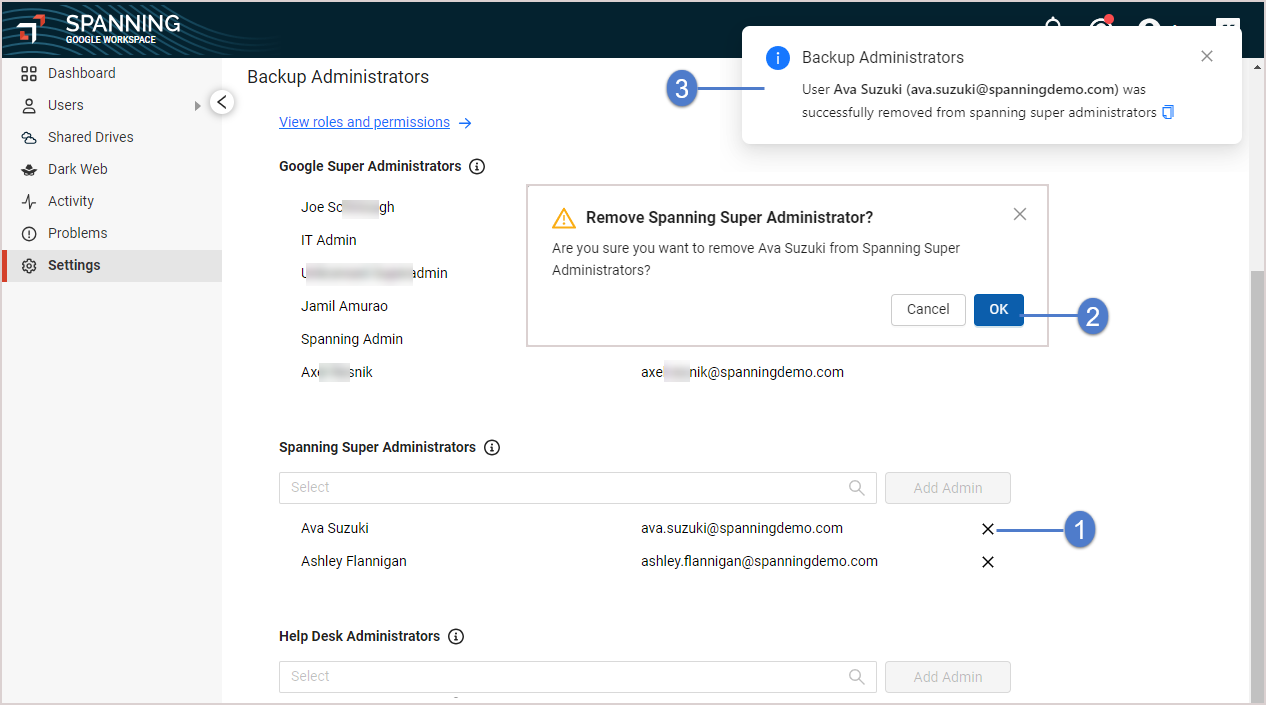
Use this tab to manage integrations with other Kaseya modules.
You can opt to:
- Configure the Login with IT Complete setting to enable single sign-on to Spanning Backup for Google Workspace from VSA or UniView.
- Configure both the Login with IT Complete and KaseyaOne Integration settings to enable seamless authentication to Spanning Backup for Google Workspace via KaseyaOne Unified Login. KaseyaOne Unified Login makes management of the Kaseya product line significantly easier for Managed Service Providers, SMBs, and MMEs who use multiple Kaseya products. This alternate authentication also removes the requirement for Google Workspace administrators to provide additional credentials to partners who manage their backups, further securing their Google Workspace domains.
- Integrate your Google Workspace domain with UniView. (You must run this procedure from the UniView Portal.)
See these topics for details:
IT Complete single sign-on (SSO) enables administrators to log into Spanning Backup with their VSA, UniView, or KaseyaOne credentials:
-
If you are using VSA or UniView for multi-domain management with Spanning Backup for Google Workspace, enabling SSO from those applications is recommended to further secure your Google Workspace domains and simplify account management. Start by ensuring that the Google Workspace domain has been added to your UniView or VSA instance as described in Check for the Google Workspace domain in UniView or VSA. Then enable Login with IT Complete as described in To enable Login with IT Complete for UniView or VSA.
-
To use KaseyaOne Unified Login for seamless authentication to Spanning Backup for Google Workspace, see the To integrate KaseyaOne procedure to enable Login with IT Complete and configure Unified Login.
Before you enable IT Complete single sign-on, you must ensure that the Google Workspace domain has been added to your UniView or VSA instance. For details, see the instructions below for the applicable VSA or UniView environment.
In VSA 10:
- Navigate to Modules > Integrations > Unitrends Backup and log into the UniView Portal.
- Navigate to the Dashboard > Spanning > Google Workspace tab and verify that your Google Workspace domain displays in the list:
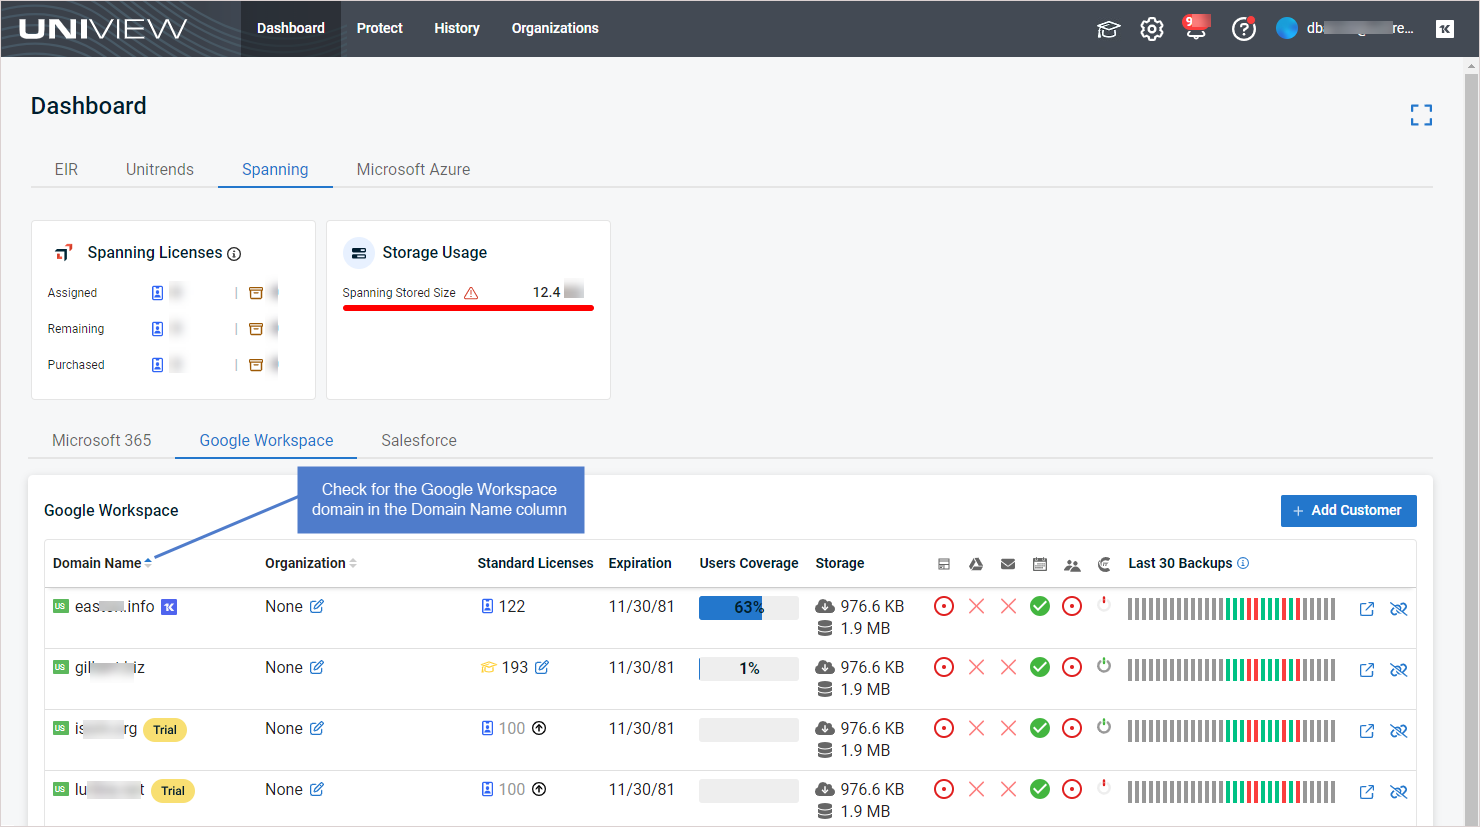
If your domain does not display in the list, add it as described in this topic in the UniView Portal Guide: Integrating a Google Workspace domain.
In VSA 9:
- Select the SaaS Backup > Customers page.
- On the Google Workspace tab, verify that your Google Workspace domain displays in the Company Name list:

If your domain does not display in the list, click Add Customer to add the domain.
In the UniView Portal (2.0):
- Navigate to the Dashboard > Spanning > Microsoft 365 tab.
- Verify that your Google Workspace domain displays in the list:

If your domain does not display in the list, add it as described in this topic in the UniView Portal Guide: Integrating a Google Workspace domain.
In UniView 1.0:
- Select the SaaS Backup > Customers page.
- On the Google Workspace tab, verify that your Google Workspace domain displays in the Company Name list:

If your domain does not display in the list, click Add Customer to add the domain.
IMPORTANT Before running this procedure, ensure that the Google Workspace domain has been added to your UniView or VSA instance as described in Check for the Google Workspace domain in UniView or VSA.
- Log into Spanning Backup for Google Workspace as a Global Administrator.
- On the Settings > Integrations tab, enable the Login with IT Complete toggle.
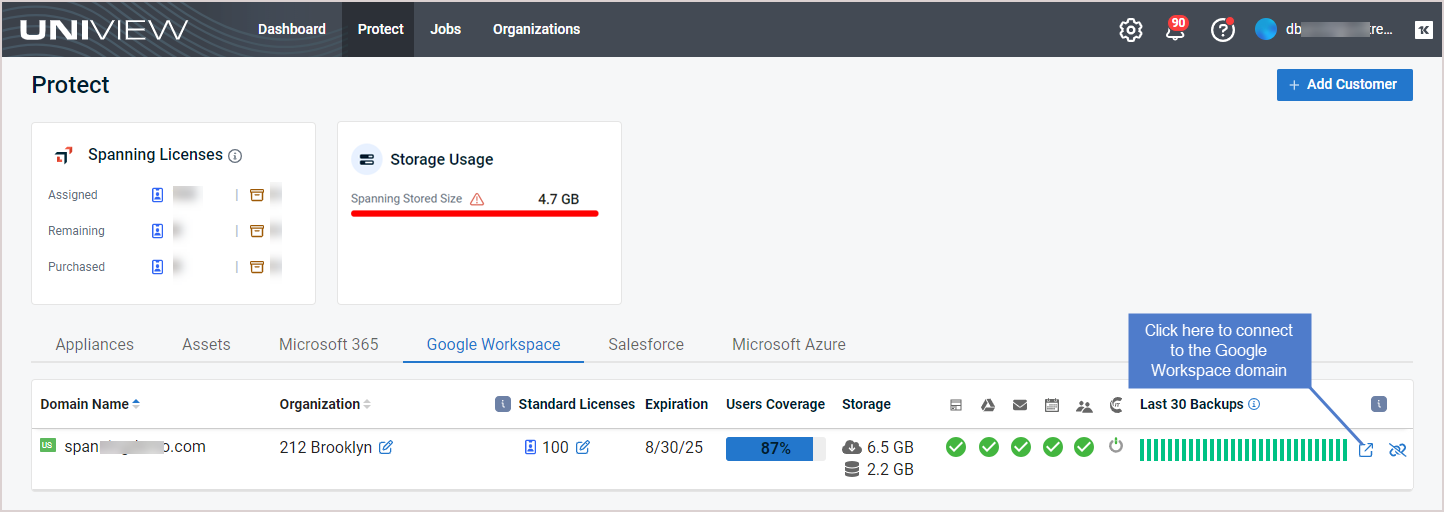
- Log into your VSA or UniView instance and locate the domain you just enabled for Login with IT Complete. Click the domain's
 icon to connect to your Google Workspace domain in Spanning Backup.
- In VSA 10: Navigate to Modules > Integrations > Unitrends Backup and log into the UniView Portal. Locate your domain on the Dashboard > Spanning > Google Workspace tab. Click
.
- In VSA 9: Navigate to the SaaS Backup > Customers page. Locate your domain on the Google Workspace tab. Click
.
- In the UniView Portal (2.0): Locate your domain on the Dashboard > Spanning > Google Workspace tab. Click
.
- In UniView 1.0: Navigate to the SaaS Backup > Customers page. Locate your domain on the Google Workspace tab. Click
.
- You are logged into Spanning Backup with your VSA or UniView account.
NOTE While logged in to Spanning Backup through IT Complete, all activity is audited and listed on the Activity page under your VSA or UniView identity.
IMPORTANT Running this procedure disables these features: SSO from UniView, SSO from VSA, and KaseyaOne Unified Login. Users that had been accessing Spanning Backup with their UniView, VSA, or KaseyaOne credentials will need to log in with their Spanning Backup credentials. Ensure that your Spanning Backup users are prepared before making this change.
As a Kaseya customer, you may be subscribed to more than one of our IT Complete modules. Rather than keeping track of different sets of login credentials for each module, you can use KaseyaOne's Unified Login feature so that users can access their modules by using a single KaseyaOne account.
To enable seamless authentication to Spanning Backup for Google Workspace via KaseyaOne Unified Login, use these steps to link your Google Workspace domain to your KaseyaOne organization:
NOTE This procedure requires Google Workspace Global Administrator credentials and KaseyaOne Master role credentials.
- Log into Spanning Backup for Google Workspace as a Global Administrator.
- On the Settings > Integrations tab, enable the Login with IT Complete toggle.
- In the KaseyaOne Integration tile, click Link Organization. You are redirected to the Google Workspace Login page.

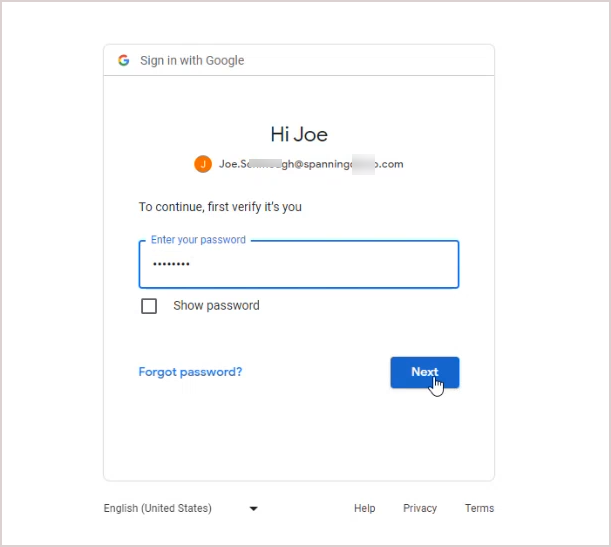
- Log into Google Workspace with your Global Administrator account. You are redirected to the KaseyaOne Login page.
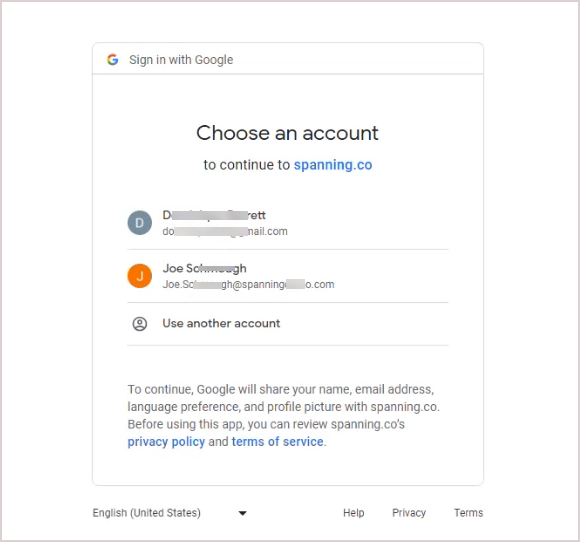
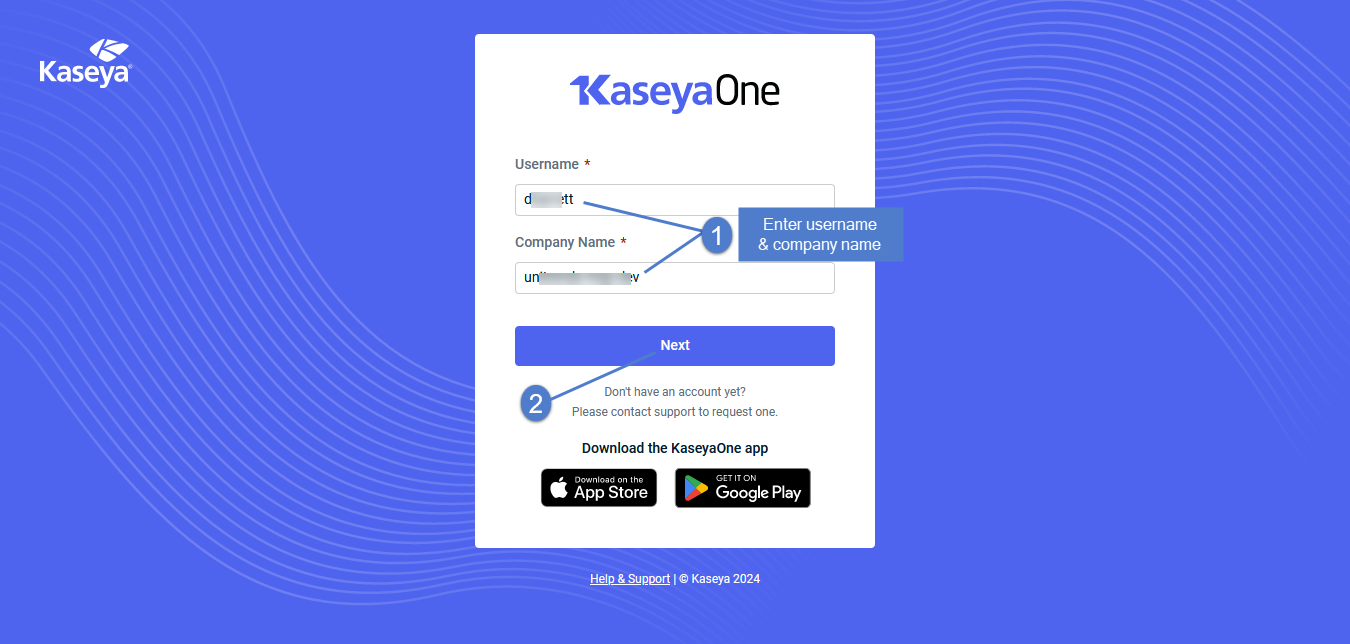
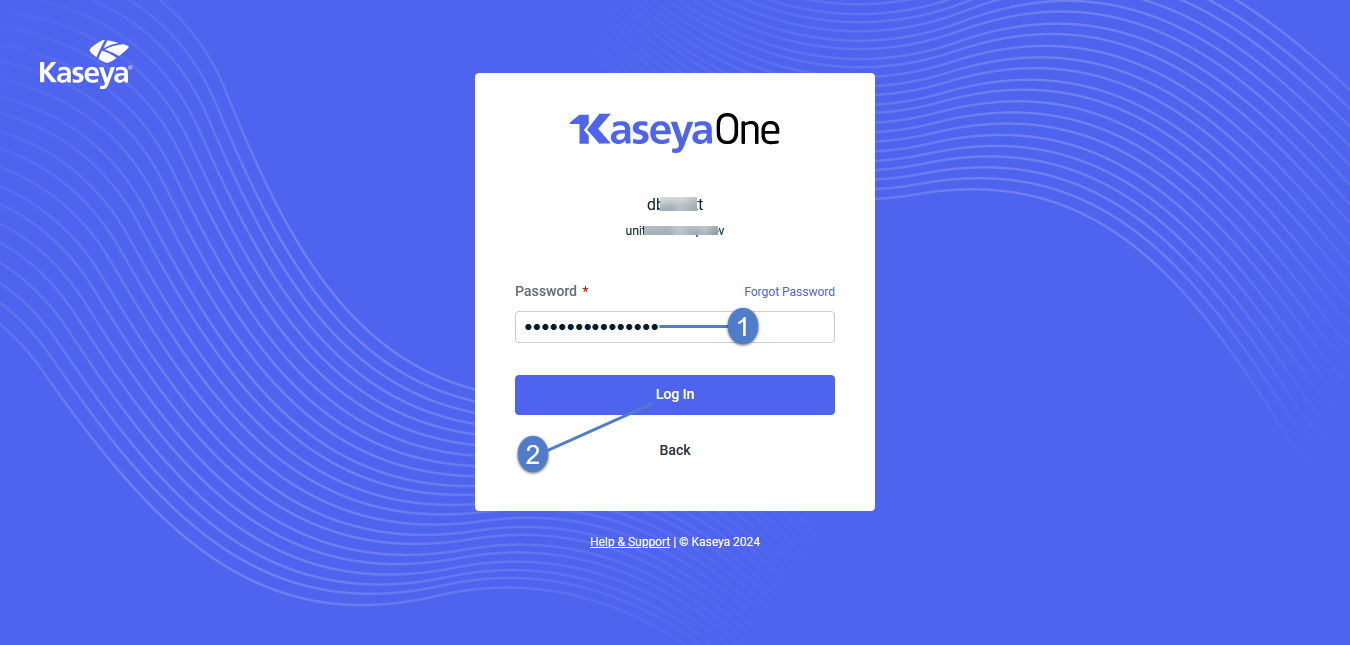
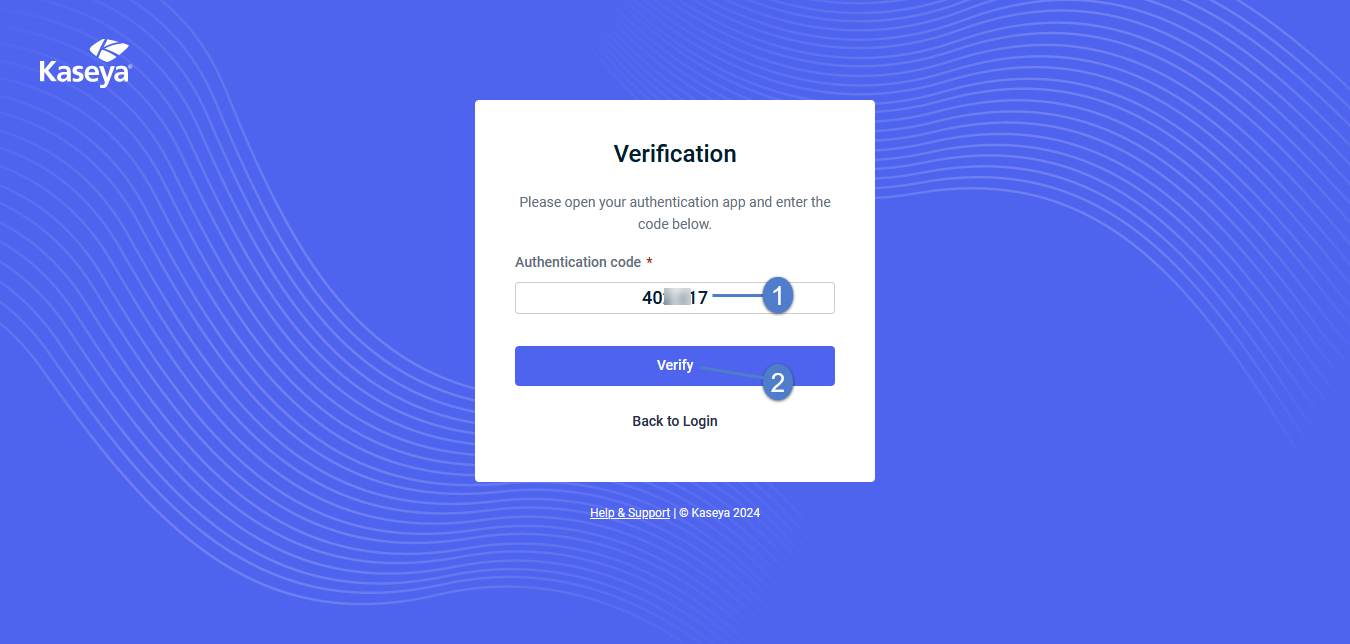
- Log into KaseyaOne as a Master role user.
- You are redirected to Spanning Backup, where you can see that the integration has been added.

- After the integration is added, any KaseyaOne user with access to Spanning Backup for Google Workspace can log into the Spanning domains that are linked to this KaseyaOne instance. (See these KaseyaOne topics for more on how to set up access to Spanning Backup for KaseyaOne users: Spanning system groups and Modify a group.)
- While logged in to Spanning Backup through KaseyaOne Unified Login, all activity is audited and listed on the Activity page under the user's KaseyaOne identity.
IMPORTANT Running this procedure disables KaseyaOne Unified Login. Users that had been accessing Spanning Backup with their KaseyaOne credentials will need to log in with their Spanning Backup credentials. Ensure that your Spanning Backup users are prepared before making this change.
From the UniView Portal, you can manage all of your Unitrends Unified Backup products in one centralized location, streamlining your workflows to maximize efficiency. Integrating your Google Workspace domain enables you to check the status of the domain's recent backups, receive alerts for failed or partial backups, allocate licenses, upgrade from a Spanning trial to a paid subscription, and view license and storage information— right from UniView.
To get started, use the UniView Portal interface to add the Spanning Backup integration, as described in Integrating a Google Workspace domain. Once your domain has been added, information is synced hourly from Spanning Backup. Use the UniView Portal to work with this data, as described in Working with the Google Workspace view.
Don't have access to the UniView Portal? Contact your Account Manager or Support to set up your free account.
Using the legacy UniView 1.0 Portal? Use the procedure below to migrate to UniView Portal 2.0.
NOTE You must be running UniView Portal 2.0 to integrate Spanning Backup. Integration is not supported for the legacy UniView 1.0 Portal.
Use this procedure to migrate from your VSA 9 TAP module or from your stand-alone UniView Portal 1.0 instance.
-
Contact your Account Manager or Support to set up your free UniView Portal 2.0 account.
IMPORTANT Do not proceed with this migration procedure until your UniView Portal 2.0 account has been created.
-
Log into VSA 9 or your stand-alone UniView Portal 1.0 instance as an admin user.
-
Go to the SaaS Backup module, then select Customers.
-
You are directed to UniView Portal 2.0. Log in to start migrating your clients.
-
The migration process can take anywhere from one to 24 hours to complete for all clients. When migration is complete, get started with UniView Portal 2.0 by adding your Google Workspace domains as described in Integrating a Google Workspace domain.


